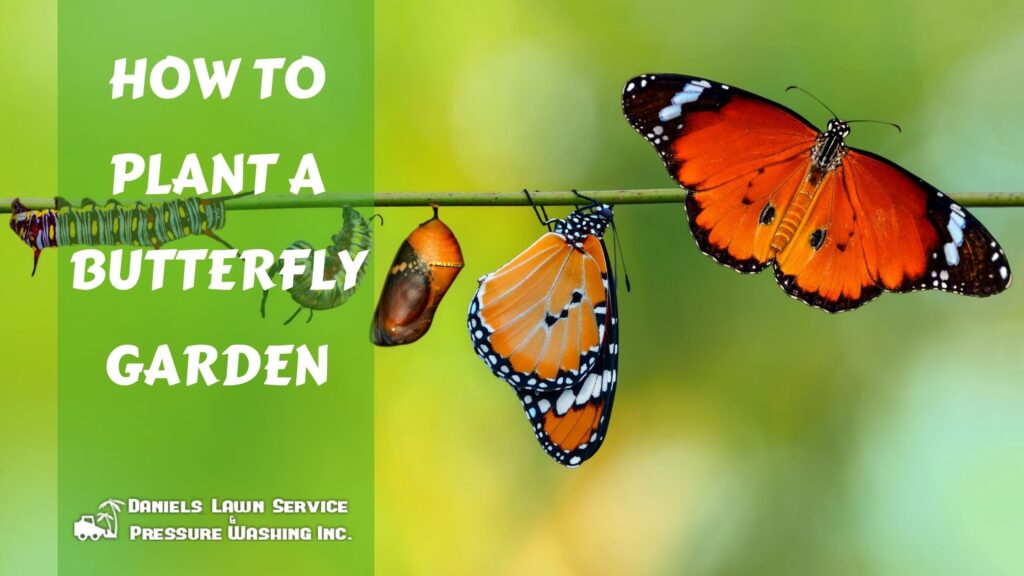
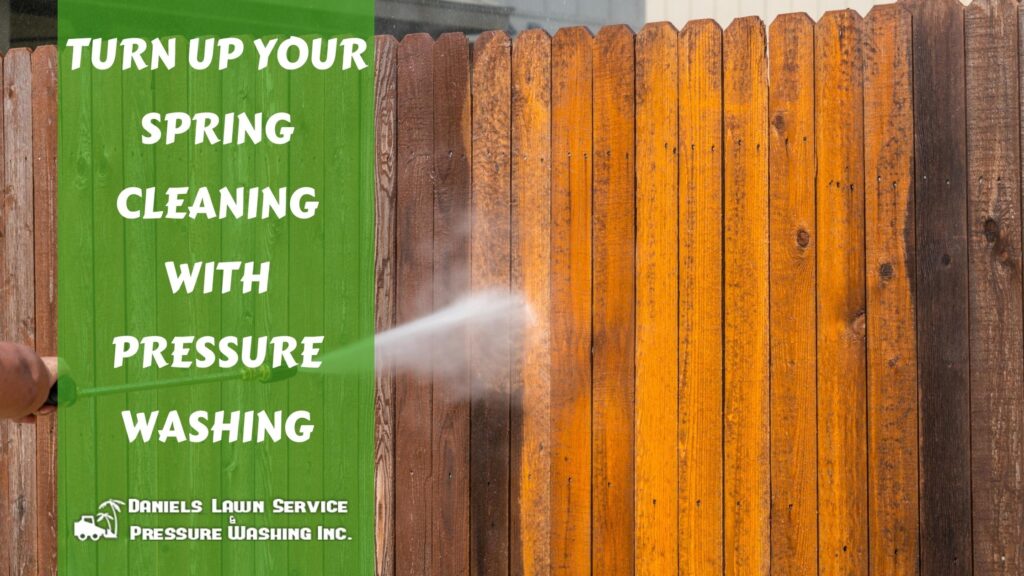
BLOG
Spring Ahead – What to Do in Your Central Florida Yard in March
Spring represents renewal and change. In Central Florida, it also represents the start of longer daylight hours and a welcome period of comfortably warm temperatures before summer’s intense heat. For gardening enthusiasts (regardless of your level of experience), it’s time to get the pruners, shovels, and fertilizers ready to work! Much like you would “spring clean” your home, the same idea applies to your yard and garden. March is the ideal month to get your slice of Florida paradise in shape so it will thrive throughout spring and summer!
Spring Cleaning in Your Central Florida Yard – What to Prune and Fertilize
Pruning is essential to not only the appearance but the overall health of shrubs and some trees. According to the University of Florida IFAS Extension, prune shrubs when new growth begins after the end of the dormant season. To guard next season’s blooms, begin pruning after the last flowers fade but before the new buds set.
UF IFAS Extension offers maintenance instructions for hedges and shrubs. For informal hedges (closely planted shrubs that are allowed to develop into their natural shape), annual pruning involves thinning and shaping just enough to maintain desired height and width. For formal hedges (those with a hard outline of foliage from the top of the hedge to the ground), clip while the new growth is green. Avoid the common mistake of trimming such shrubs into a uniform “box” shape. Instead, trim so the top is narrower than the bottom. This allows sunlight to reach all of the plant’s leaves so that the lower branches don’t thin out and die.
Don’t forget your flower beds! Gardening expert Doug Jimerson writes the following for Costa Farms: “Rake leaves and mulch away from garden beds to allow the foliage of spring-flowering bulbs and perennials to poke through. During the winter, leaves can pack down, forming an impenetrable barrier to new growth. Plus when you pull back the mulch, the soil will warm faster because it’s exposed to the sun. Use a plastic leaf rake when you remove mulch. Metal garden rakes with sharp tongs can rip tender foliage from emerging plants.”
As for fertilizing, Jimerson advises: “Fertilize camellias and azaleas after they finish flowering. Use a commercial camellia/azalea granular fertilizer sprinkled around the base of the plants. Be sure to read the label for application rates. Feed monthly through August for best growth and flowering. In the fall and winter, use a 0-10-10 fertilizer to help build next spring’s flower production. That mixture of nitrogen, phosphate, and potassium will also increase your plants’ ability to tolerate cold weather.”
Although not as obviously sandy as the soil in Florida’s coastal counties, Central Florida’s soil lacks certain nutrients – making fertilizing necessary to achieve optimum growth and beauty in your plants. The types of plants or trees you have determine how often they should be fertilized. Look for a brand that contains a slow release of nitrogen and potassium, and has a nitrogen, phosphorus, and potassium ratio of 16-4-8. Be sure to follow the manufacturer’s directions for use for the best results. Fertilize palms, azaleas, and camellias as needed. Re-mulch after fertilizing. This locks in the fertilizer and keeps moisture better through the dry season. Now is also the time to plant new shrubs.
Great Annuals and Shrubs to Plant in March
Now it’s time for the fun part – deciding what to plant! Let’s go back to the flower beds you’ve cleared of spent winter annuals and replace them with varieties that will bloom into the warmer months. Tree Care by Robert Miller recommends planting bulbs like caladiums – which will grow well throughout the spring and summer. Consider planting daylilies, which come in early-, mid-, and late-blooming varieties to guarantee months of blooms. It’s also important to consider where you are planting your flowers. Look for plants that will do well in specific areas in your yard. Some plants will thrive in the sun while others need more shade.
If you’re looking for a low-maintenance, long-lasting, and colorful addition, caladiums are the perfect fit for your spring garden. Caladiums are unique when it comes to their foliage: no leaf is like the other! Although their leaves are stunning, they are easily damaged by a strong wind, so make sure you plant them in a protected area. For more spring flower varieties, our blog post – “Spring Flowers You Want In Your Central Florida Garden” – provides many other colorful options!
For shrubs and ornamentals, Tree Care by Robert Miller recommends gardenias, which bloom many months out of the year and are easy to maintain if you choose the right type. FYI: Prune for shape more than anything else. However, this should be done lightly and after the plant has finished blooming. Fertilize gardenias in early spring and fall.
Herbs and fruits are also a great addition to your garden. The plants themselves are lovely, and give you fresh ingredients for your favorite recipes! Popular herbs to plant for spring include:
- dill
- fennel
- garlic
- ginger
- ginseng
- parsley
- sweet basil
Strawberries and raspberries are perfect for an early spring garden bed or container. Be sure to place them in well-drained soil and provide at least six hours of sunlight.
In March and April, plant warm-weather-loving vegetables such as:
- squash
- beans
- sweet corn
- cucumbers
- tomatoes
- watermelon
- peppers
Always make sure to use quality seeds and plants zoned for your area. Central Florida is zone 9b. In late April and May, you can begin introducing heat-loving plants such as okra, southern peas, and sweet potatoes.
Other Lawn and Garden Tips for Spring
- Water is a precious resource. If you have an irrigation system, it’s important to check it now. Look for broken heads or inefficient spray patterns that can waste water. Also, adjust your timer so you aren’t watering your yard during the rainy season.
- If you are aiming to create an environment for native wildlife, consider adding a pollinator area to your garden. A pollinator garden helps attract pollinators such as bees, hummingbirds, and butterflies. Also, planting native Floridian plants helps reduce the need for fertilizing and heavy watering.
- Most lawns and gardens require an inch of moisture a week. If you are unsure of how much water you are providing, set a coffee can in the yard and measure what it catches.
- Keep a light blanket or grow cloth handy just in case the temperatures drop unexpectedly. Cover your plants at night if it drops below freezing. We still get some cold nights just when we think winter is behind us!
- For strawberries and raspberries, plant both everbearing and June-bearing types to gain the maximum amount of fruit over a longer period of time.
- Sow radishes, spinach, beans, and peas in wide rows instead of single file. You’ll get more produce per square inch if you scatter seed in a 6- to 10-inch wide band.
- Spray your trees before they leaf out with a dormant oil spray. It’s an effective method of reducing insect pests organically (follow label directions when you apply).
- Use a plastic leaf rake when you remove mulch. Metal garden rakes with sharp tongs can rip tender foliage from emerging plants.
As you can see, there’s a lot to keep you busy outdoors in March! If you need help with any aspect of lawn and garden care, call Daniel’s Lawn Service & Pressure Washing! Our experienced team can work with you to achieve your goals and bring your vision to life! We also provide landscape design, tree installation, tree trimming, yard maintenance, pressure washing and so much more. Contact us today!
What is Bush Hogging?
While bush hogging — sometimes referred to as brush hogging, rotary cutting, or rough-cut mowing — may sound like a foreign concept to many people, it’s sometimes necessary in order to clear overgrown land.
When thick vegetation proves to be too much even for a riding lawn mower, bush-hogging steps up to the plate. Bush hogging clears bushes, tall grass, saplings, weeds, and other plant life with the use of heavy-duty rotating blades. This method of clearing allows overgrown areas of land to be developed for farming, recreation, and many other uses. It’s also good for undeveloped empty lots or any large property with a yard that’s been neglected for a long time.
What is a Bush Hog?
Bush Hog, Inc. is a manufacturer of rotary cutters, finishing mowers, landscape tools, and tractor-mounted implements used in the agricultural market. According to the company’s website, “The ‘Bush Hog’ brand is associated with rotary cutters and the act of cutting itself, having invented the brush mower over a half-century ago, and is often used as a generic term to describe a rotary cutter or the cutting of a field.”
The blades of a bush hog are different from standard mowers, which have fixed blades. A bush hog has blades that are not rigidly attached to the drive like a lawnmower blade but are on hinges. This allows the blades to move and shift, so they can glide easier over uneven land and rocks. Using centrifugal force, the blades can move inward, backward and forward again to provide a clean cut.
A bush hog attaches to a tractor by means of the tractor’s power take-off (PTO) shaft, which transfers horsepower from the tractor to the implement. Obviously, this is not a piece of household lawn maintenance equipment, and there are good reasons why the only times you may have seen it used have been on the side of roads by landscape maintenance crews or on a farm.
What Jobs are a Bush Hog Used For?
Bush hogging is appropriate for clearing land of heavy vegetation — such as thick, overgrown grass, bushes, saplings and tall, dense weeds. It can cut down grass that has reached over 25 inches in height and saplings that are 1 inch in diameter or less. Bush hogging is a preferred method to other types of tree removal (i.e., bulldozing) as it avoids agitating the ground through invasive root extraction and environmental disruption.
Granted, this is a service that the average city or suburban homeowner isn’t likely to need on a regular basis. However, you may encounter one of the following situations in which it’s clear that a standard mower and yard tools literally won’t cut it:
- You’ve bought or inherited a house with a long-neglected yard. Fans of house-flipping cable TV shows have seen this type of backyard jungle.
- You have a piece of property that you want to use for recreation or light agriculture.
- You’ve bought a vacant lot adjacent to your home.
- You own a vacant lot in an area that’s now experiencing home construction and want to be a “good neighbor” by keeping your property clear and mowed. Not only does an overgrown lot look bad, it can bring down the property value of nearby homes, as well as be a breeding ground for vermin — thereby creating a health hazard.
Those who live on a multi-acre property, farm or ranch may have other reasons for bush hogging:
- You want to use part of your land for a new or different purpose — such as expanding an area for crops, clearing an area for recreation (ball field, deck, etc.), or beekeeping.
- Clearing land for building or assembling an outbuilding.
- Performing grounds maintenance at the start of a new season.
By clearing out unwanted vegetation, bush hogging allows nutrient-rich soil to nourish the plants you do want, encouraging a healthy ecosystem that attracts beneficial insects and birds. How frequently you bush hog depends on the area you’re maintaining and what you intend to use it for.
- Pastures and hunting grounds: Every 6-12 months.
- Saplings that grow quickly: Every 3-6 months.
- Land that needs to be cleared: Clear initially and then go back over it.
Why You Should Hire a Pro Instead of DIY
While we do sometimes offer instructions for performing some landscaping and yard care projects yourself, this is not one of those times. Bush hogging is hazardous for the inexperienced. The experts at United Family Lawn Care offer this warning:
“… we highly recommend that you do not attempt to operate this machinery on your own even if you own a tractor. Chances are if you are like most people you do not have a tractor on your property. You may have heard about attachments for the ATV or riding lawnmower but we also do not recommend these because they can be unsafe.
“This process should be left to a professional. They have the training needed to operate this equipment in a safe and effective manner. These services should only be performed by professionals. They have the proper equipment and training to operate the bush hogger. They will also make sure that the land is cleared out completely and all of the tall grass or weeds are leveled.”
We couldn’t have said it better ourselves! As for bush hogging, there’s no one better in Central Florida to call than Daniel’s Lawn Service & Pressure Washing! Our experienced professionals can handle any land clearing job quickly, efficiently and safely! Our land clearing services also include tree removal and tree stump removal.
Once that is done, consider us for the rest of your lawn care and landscaping needs! We can work with you to achieve your goals and bring your vision to life! Contact us today!
Best Plants for a Privacy Hedge in Central Florida
You may have a passion for making your yard the envy of the neighborhood, but there are some areas of your property you want to keep private. While solid fences are popular for providing a visual barrier so you can enjoy your backyard without observation by neighbors, they’re expensive to build (and require a building permit to do so legally), and need to be cleaned on a regular basis — although we at Daniel’s Lawn Service & Pressure Washing can definitely take care of that! Opting for a privacy hedge instead can deliver most of the advantages of a solid fence — plus a few others!
However, success depends upon knowing which shrub to choose for the area to achieve the desired height and thickness, as well as the requirements of the species for sun exposure and soil type. Our blog post — “The Best Shrubs For Your Central Florida Yard” — covers the basics about Florida-friendly shrubs as an introduction.
But first, a caveat. If you live in a community with a homeowners association (HOA), there may be a restriction on the maximum height of shrubbery allowed and/or physical barriers between properties. Check your HOA’s rules and regulations before planning a privacy hedge.
What are the Advantages of a Privacy Hedge?
According to the wise words of poet Robert Frost, “Good fences make good neighbors.” A good privacy hedge envelops your yard in natural greenery — unlike a wood or vinyl fence — while creating a secluded, park-like area for relaxing and entertaining.
From an aesthetic viewpoint, a privacy hedge can also act as a backdrop for other plants, or seating — such as patio chairs. Just be sure that whatever you plant or set in front of it (if it’s heavy, like a concrete bench) is far away enough to allow access to trim the hedge.
Plant Professionals offers the following additional benefits of having a privacy hedge:
Reduces noise – Dense shrubbery can dampen sound – such as traffic and the next-door neighbor’s activity — without totally removing you from nature. It also does likewise for sounds coming from your yard, which keeps your conversations more private.
Adds curb appeal – A privacy hedge creates a more upscale impression of your property, enhances the overall appearance of the neighborhood and could even increase the property value if you decide to sell your home.
Creates wind resistance – A healthy, densely planted hedge can help absorb strong wind gusts, preventing objects in your yard from being blown about (and potentially causing damage to outdoor furniture, small out structures and windows). However, take the usual precautions during hurricane season.
Provides shade – Tall shrubberies can prevent full sun from entering your yard at certain times of day, providing some shade and absorbing heat to keep your patio and yard cooler. While this can be a plus, make sure that nearby plants are shade-tolerant. Those requiring full sun may need to be transplanted elsewhere on your property.
Best Plants to Grow for Privacy
Now for the good part — recommendations about the best plants to grow for privacy in Central Florida! Listing here does not necessarily mean endorsement. While they are all good, hardy shrubs, not all may be equally suitable for how you use your yard or may require more maintenance than you’re able or willing to provide. Remember, you’ll be dealing with several shrubs planted closely together, rather than one or two! Do your research carefully if you’re not working with a professional landscaper who can recommend hedge shrubs based upon the characteristics of your property, desired use(s) of your yard and your lifestyle.
Florida Gardening offers the following list of Florida-friendly hedge shrubs:
Bamboo – In a frost-free zone, bamboo makes a perfect screen for your landscape. There are two types of bamboo — running and clumping. Of the two, clumping is easier to maintain, does best in full to partial sun and won’t grow aggressively out of bounds. The color and heights of stalks can vary, allowing for a little pop of color to your landscape design. Alphonse Karr (Bambusa multiplex) has a golden yellow cane and can grow to 30 feet tall, while black bamboo (Phyllostachys nigra) offers black canes and grows about 20-25 feet tall.
Bay laurel – For those who enjoy the added benefit of growing their own culinary herbs, bay laurel is the perfect shrub for your privacy hedge. They average about 12 feet tall and grow thick, leathery leaves that produce a light scent. Bay laurel grows best in full sun to shade with consistent watering and well-drained soil.
Bottlebrush – Bottlebrush (Callistemon spp.) is a must-have for those wanting a colorful and larger shrub that attracts butterflies and hummingbirds in Central and South Florida. The evergreen produces intense red flower spikes, blooming spring through fall adding color to the landscape almost year-round. Gardeners have choices in an upright and weeping variety that produces the same colorful blooms, and the upright form grows up to 20 feet tall and wide — making it suitable for use as a hedge or screening plant. It grows best in full sun and in a variety of well-drained soils.
Clusia – Clusia is both drought- and salt-resistant with dense foliage. It also adds a tropical feel to any landscape with its thick, green, oval leaves. This shrub grows 25-30 feet tall and spreads 15-25 feet and produces 3-inch white and pink flowers that bloom at night during the summer. This shrub is great for a hedge or to use as a screen, as it grows well in full sun to partial shade and in well-drained soil.
English laurel – This shrub is perfect for more traditional hedges because it is easy to prune and maintain. It grows best in zones 6-9, tolerates salt spray, requires full to partial sun, and grows 12 feet high 8 feet wide with regular waterings.
Sea grape – This tropical and robust shrub is salt, drought, and wind-tolerant and offers a surprise bonus fruit! This native evergreen is identifiable by its 8-inch diameter and leathery, green leaves that turn red in the winter. This shrub grows up to 50 feet tall and spreads out 20-30 feet wide. These hardy shrubs grow in full sun to partial shade with a variety of well-drained soils.
Tips for Planting a Privacy Hedge
It’s not always easy to get things to go right the first time, so we thought this helpful article from Monrovia that provides need-to-know tips will help ensure your shrubs thrive to create a thick, healthy privacy hedge.
- First, identify your goals. Lots of privacy? Blocking out an eyesore? Windscreen? This will help you to choose the right size and habit (overall shape, appearance and form).
- Decide on the style of hedge you want. Some plants have a tight, formal look while others are looser and less formal.
- Read and believe the information on the tag about eventual mature height and width!
- Plant shrubs a bit closer for a hedge than you would for a single specimen, but be careful not to crowd. Ask your local garden center for advice regarding your specific plant if you’re doing it yourself.
- While waiting for plants to develop, fill gaps between them with perennials or ornamental grasses. You can move them later!
- Plant an extra few shrubs elsewhere on the property so that if something goes wrong with the hedge, you have a replacement that’s the same size and type.
Should You Do It Yourself, or Hire a Professional Landscaping Service?
Avid gardeners may welcome the challenge of planning and planting a privacy hedge. Just ask yourself this question: How soon do you want the hedge to effectively block the view into your yard? Installing shrubs that are more mature means transporting several large shrubs, moving them to their position, digging holes, planting them, etc. Not everyone has the time, suitable vehicle for transportation or physical strength to take the DIY route. And if you want to create privacy immediately — or soon — waiting for young shrubs to grow to the desired height and fullness isn’t practical.
As you’ve learned, planting a privacy hedge is much more labor-intensive than planting ornamental shrubs as accents. Daniel’s Lawn Service & Pressure Washing is a full-service landscaping company that does it all — from planning the perfect privacy hedge to plant installation, maintenance and trimming. We leave nothing to chance, and leave you with nothing to do but water your hedge and enjoy your yard in peace, quiet and privacy!
Now a few words about trimming before we conclude. Keeping your privacy hedge well-trimmed should be a priority — not only because its appearance affects the attractiveness of your property, but because it also affects the attractiveness of your next-door neighbor’s property. A hedge that’s allowed to become overgrown and unkempt could cause ill feelings in a neighbor who maintains a neat, tidy yard!
We recommend leaving trimming to the pros, as well. Trimming a tall privacy hedge requires the right equipment and physical stamina. If it’s tall enough to require a ladder to reach the top, you need a sturdy ladder made for the task, and the proper protective clothing — no flip-flops! You may not be eager to perform this strenuous, lengthy job during a Florida summer, as well.
Whether you want the benefits of a privacy shrub or other landscaping improvement, our experienced team can work with you to achieve your goals and bring your vision to life! We also provide tree installation, tree trimming, yard maintenance, pressure washing and so much more. Contact us today!
How to Protect Your Plants From Freeze
Now that nighttime temperatures are plunging (by Central Florida standards, anyway), we switch the air conditioner over to heat and add a blanket to keep warm. But what about your plants? Although January is typically the coldest month of the year in the Sunshine State, this is the time to make a plan for protecting your cold-sensitive plants from freeze — rather than scrambling to cover what you can with whatever you have on hand when the weather report predicts an overnight low of 32° Fahrenheit or below. Being prepared with the right supplies and taking proactive measures can help your plants survive winter and be ready to thrive in the spring!
Yes, Plants Can Freeze in Central Florida
While new Central Florida residents from up north may think they’ve left harsh winters behind, they’re right! But many shrubs, perennials, annuals and even some trees are still susceptible to temperatures that are considered a light freeze (29° to 32° F) back home. Tropical plants are especially vulnerable — which is important to keep in mind if they were already on your property when you bought your house, or you planted sago palms, hibiscus, etc., because you wanted a Florida look for your landscaping.
Also keep in mind that although tropical plants are popular here, Central Florida’s climate is actually subtropical — unlike most of South Florida, which has a true tropical climate. For this reason, Central Florida doesn’t tend to experience prolonged freezes, but even one night of freezing temperatures can be enough to kill or damage plants. The USDA Plant Hardiness Zone Map for Florida designates growing zones and average low temperatures for each. Central Florida is zone 9B, with minimum temperatures ranging from 25° to 30° F.
By the way, it isn’t just newcomers who need to learn proper freeze protection methods. New homeowners in general or those who have recently developed an interest in gardening — be they Florida natives or semi-natives — may not know as much as they think!
Plant Smart to Prevent Freeze Damage
The first defense you can take against freeze damage is proper planning of your plantings. Again, if your plants are already established, you’ll need to work with the situation as it is. But if you’re in the process of planning your landscaping, give your new plants the advantage of the optimum location to prevent damage. Our blog post — “Plan Your Landscape Design for the Long Term” — provides more detailed information on this and other related topics.
As South Florida Plant Guide observes, cold fronts generally come from the northwest or west. “Placing tropicals on the south and east side of your home makes use of one of the best cold barriers — the house itself.” Also, as ASI Landscape Management points out, the south and east sides of a house retain the sun’s heat longer.
Other placement advice includes the following:
- Install different types of plants in areas that meet their specific requirements for drainage, support, sun/shade and wind protection.
- Group plants of different kinds to gain the advantages of symbiotic relationships.
- Place big trees or palms in areas shielded by large, more cold-tolerant trees. Understory plantings with tree canopy coverage help insulate the area by keeping it warmer and protected from frost.
- A fence or cold-hardy hedges on the north or northwest side of tropical plants can act as a buffer against cold winds.
Regardless of whether you’re able to plant strategically to shield against frigid winds, additional measures can help increase survivability. Be sure to add extra mulch around sensitive plants, which helps to trap the soil’s heat. Our blog post — “Why You Should Mulch Your Central Florida Landscape in the Fall” — covers this topic in detail. When a freeze is forecast, water your plants early in the day. This allows the soil to absorb warmth from the sun and warmer daytime air, thereby helping plants survive the cold. Also, cold winds are drying, taking a toll on plants that are already too dry.
The Do’s and Don’ts of Covering Plants
Being prepared for a freeze is essential to saving your plants. Those that should be covered include citrus, fuchsia, bougainvillea, succulents, salvia, hibiscus, jasmine, tree ferns and penstemon. Cypress Creek Landscape Supply recommends covering any recently installed plant — even if it’s cold-hardy — as it takes time for a plant to become well-established enough to survive a freeze.
When a cold front approaches, the panic reaction for unprepared homeowners is to grab whatever old sheets, beach blankets, etc., are available and cover vulnerable plants. Worse yet is improvising with a sheet of plastic, or large plastic garbage bags. Landscaping professionals agree that bedsheets and plastic should never be used to cover plants. A sheet does nothing to protect against the cold, while plastic doesn’t “breathe,” and can actually create an even colder temperature underneath. Plastic also tends to allow moisture to form on plant leaves, causing them to burn.
In addition to bedsheets, blankets, towels and other make-do standbys not providing adequate protection, such items are heavy and can break branches. They are difficult to secure on the plant and will also transmit cold to the plants if they become wet. Blankets and sheets do not allow for light penetration or airflow, and can “cook” the plant if they get too hot.
Some recommend a quilt or blanket as a last resort, but only for hardy, well-established plants that won’t be damaged by their weight. Burlap can be used, but shouldn’t touch the plants, which necessitates creating a tent-like structure with wooden stakes. This prevents wet burlap from freezing and damaging foliage and ensures the cover doesn’t blow away in the wind. However, this may be too labor- and time-intensive for most people.
To be ready with the right protection, buy frost cloth. This is an insulating material of woven fabric created specifically to protect plants from freeze damage. It’s available at plant nurseries and home improvement centers, as well as major online retailers.
The good people at Green Acres Nursery & Supplies provide the following instructions for correctly placing frost cloth:
- Completely drape the plant from the top all the way to the ground.
- Apply the cloth right before sundown to make sure the cloth gathers the heat produced in the ground during the day.
- Don’t leave any openings in the cloth for the warm air to escape or cold air to enter at night.
- It is crucial that the frost cloth touches the ground, to the drip line of the plant.
Placing a heavy object like bricks or securing the fabric into the ground with frost fabric staples will ensure that the cloth forms a seal with the ground and traps the warm air that radiates from the soil that is captured during the day. The bricks or staples will also secure the cloth in the case of heavy winds and/or rain, reducing the chances of it blowing away.
The following are general instructions for covering plants, regardless of what you use:
Do’s:
- Do cover your plants with frost cloths, burlap, or muslin for protection against bitter winds.
- Do use concrete bricks or blocks to hold down the material around the plant’s base. Follow manufacturer’s instructions for securing a frost cloth.
- Do remove coverings in the morning. Manufacturers’ instructions for frost cloths may indicate they can be left on, but this doesn’t take Florida’s sunny winter days into account.
Don’ts:
- Don’t wrap the covering too tightly around the plant. It crushes the foliage and breaks the stems.
- Don’t prune any freeze damage until the last freeze has passed. The shock of freezing and pruning combined can be enough to kill the plant.
- Don’t leave coverings on for more than two or three mornings in a row.
- Don’t fertilize. Fertilizer promotes new growth, which will only wither in the cooler temperatures.
You may be wondering how to protect potted plants and container gardens that are too heavy to move indoors or to a sheltered outdoor area. ASI Landscape Management recommends congregating them together as much as possible, then covering them in groups. When temperatures rise, uncover and separate the containers and return them to their original places.
The Take-Home Message
Even though we don’t have to contend with snow, winter in Central Florida poses its own set of challenges for keeping your plants healthy and your landscape beautiful. Our blog post — “How to Winterize Your Central Florida Lawn” — provides many more tips you’ll find useful!
As you’ve learned, placing plants in areas that both protect them from the elements throughout the year and enhance the aesthetics and function of your property can be tricky. It also can involve a good deal of trial and error that may be expensive and time-consuming. Our professional landscapers at Daniel’s Lawn Service & Pressure Washing are ready to work with you to achieve your goals and bring your vision to life — as well as select and install the best plants, trees and even turfgrass to get the best out of your slice of Central Florida paradise!
Our full-service company provides yard maintenance, tree installation, tree trimming, stump removal, pressure washing and so much more. We take pride in making your lawn the best on the block! Contact us today!
Why You Should Mulch Your Central Florida Landscape in the Fall
A fresh layer of mulch always helps your landscaping look its best, and boosts your home’s curb appeal! But while you may typically mulch in spring, mulching in fall provides numerous benefits – including supplying your soil with nutrients that will make those spring flowers even healthier. There’s more to learn, so keep reading!
Mulch Protects, Nourishes and Beautifies Your Landscaping
While fall generally isn’t considered the prime time for mulching, applying a good layer during this season is an easy, economical way to help your plants stay alive and well throughout winter. Although our Central Florida winters are relatively mild compared to much of the United States, the occasional freeze still hits – claiming the more sensitive flowers, shrubs and even trees in your landscape. Instead of spending the money (and time and labor, if you do your own gardening and lawn care) to replace plants, investing in some mulch can pay off!
According to the University of Florida’s Institute of Food and Agricultural Sciences (UF/IFAS) Gardening Solutions program, “Proper mulching is an essential component of any Florida-Friendly landscape. Perhaps most importantly, it is the cornerstone of a great weed-control program. Mulch keeps the soil moist longer after irrigation, too. This gives plant roots extra time to soak up water. Mulch also protects plants’ roots from extreme temperatures by creating a buffer between the soil and the air.
“And mulch isn’t just good for your plants; it’s good for your soil. Organic mulches can add nutrients to the soil as they decompose. This improves your soil’s aeration, structure, drainage, and ability to hold nutrients. Mulch can even help reduce erosion and protect plants from certain diseases.”
Reliable Peat Company recommends laying mulch three inches deep to achieve the greatest benefits in insulation, moisture conservation and inhibiting weed growth. If you’re re-mulching, remove some of the old material that has built up over time before spreading the new. However, replacing the mulch entirely isn’t recommended, as you may damage surface-level plant roots.
As for beautifying, mulching in fall gives your property an uplifted, special look just in time for the holidays. If you decorate your yard, new mulch will enhance the festive effect. Also keep in mind that mulch is the perfect solution to spruce up those “dead zones” in your yard where plants and grass won’t grow – such as areas that are always shaded.
In addition, researchers are finding mulching has significant environmental benefits. According to Susan D. Day, an associate professor in the Department of Forest Resources & Conservation and Department of Horticulture at Virginia Tech, having bare soil on your property will cause erosion and sediment runoff. Mulching can help control erosion. Research by Day and Virginia Tech graduate student David Mitchell found that bare soil lost about five times as much sediment as soils covered with mulch.
Popular Types of Mulch for Central Florida Yards
Most people are guided by cost and color, buying the mulch that provides the best aesthetic look for their landscaping at the most economical price. But as UF/IFAS points out, there need to be other considerations – such as origin, durability and nutrient content. For example, the rich blonde color of cypress mulch has made it a popular choice, but some of this mulch comes from Florida’s endangered wetlands. Because its origin is difficult to determine, the Florida-Friendly Landscaping™ Program does not recommend the use of cypress mulch.
Ditto for so-called “utility” mulch, but for a different reason. It comes from local trees and brush, and can contain weed seeds and insect pests that will infest your grass and plants. However, it may be a good choice for driveways, walkways and natural areas if spread far enough away from cultivated areas.
All organic mulches break down over time. When part of their purpose is to nourish the soil, this is considered beneficial. If the main purpose is to define specific areas or landscaping features, installing inorganic materials – such as pebbles and gravel – can save expense and time. Even this alternative isn’t maintenance-free, as you need to first install a woven ground cloth to keep the stones from sinking into sandy soils, and they need to be regularly cleared of debris to look their best. They also tend to migrate into other areas, and could pose a hazard when you mow the grass. UF/IFAS recommends rock mulch be reserved for use on pathways, in dry creek beds or under downspouts.
Rubber mulches made from recycled tires are not recommended by UF/IFAS. They are generally less effective than organic mulches in suppressing weeds. This material also absorbs heat, leading to extremely high temperatures in the ground beneath. In addition, some UF/IFAS Extension staff are concerned about the possibility of toxic chemicals leaching into the soil as the material slowly degrades.
UF/IFAS lists the mulch options available at most home and garden stores in Florida. This is a partial list. Please click on this link for the complete list, which includes descriptions of each type.
- Pine bark
- Pine straw (needles)
- Fallen leaves
- Mixed hardwood mulch
- Melaleuca mulch
- Eucalyptus mulch
Where to Use Mulch – and Mistakes to Avoid
Mulch is an attractive accent to any yard any time of year, but you need to know some basic do’s and don’ts before heading out to the nursery or home improvement center. Florida-Friendly Landscaping recommends mulching to a depth of 3 inches. Maintain a 2- to 3-inch layer around established trees, shrubs and bedding plants. Coarse materials – such as pine nuggets – may be applied 4 inches deep, but don’t allow mulch to accumulate to a greater depth. Adding more can harm plants if the mulch intercepts rain and irrigation meant for their root systems.
UF/IFAS advises the following. “Mulch to the drip line or beyond. The mulched area around the tree should be at least 8 feet in diameter. In the forest a tree’s entire root system, which usually extends well beyond the drip line, would naturally be mulched by fallen leaves.”
But of course, mulch also provides aesthetics that enhance the overall beauty of your property. Home lifestyle writer Lori Johnston and Susan Day provide the following tips for HGTV.
Consider the entire scope of your landscaping – “Some landscapes have big expanses of mulch with a few shrubs poking around,” Day says. “You want to design your landscapes so your shrubs cover all of the soil and you have complete vegetative cover. Then apply mulch to them, to control moisture.”
Choose a mulch that will complement your house, if possible – For an extra “pop,” choose a mulch that complements your home’s exterior colors. It can also be used to enhance your landscape theme and setting.
Avoid these common pitfalls:
“Volcano mulching” – Piling mulch against the base of a tree is known as volcano mulching, based on the appearance it creates. Instead of protecting the tree, it holds moisture, which encourages rot in the trunk. Volcano mulching a young tree can also create a habitat for rodents, which chew the bark – ultimately killing the tree.
Using a layer of plastic or landscaping fabric between the soil and organic mulch – Contrary to prevalent belief, this practice could cause more water runoff and keep your garden from having a clean, streamlined look. It also can prohibit the nutrients from the mulch to absorb into the soil.
Using bad mulch – Cheap mulch isn’t always a bargain. If you don’t know the source of the mulch material, it could contain weed seeds and/or insect pests. Buy from a reliable source – or have it delivered and installed by a lawn service professional.
The Take-Home Message
Although we focused attention on the benefits of mulching your landscaping in fall, most of the information provided here applies throughout the year. Now that you’re thinking about lawn and garden care for fall and winter, our blog post – “Preparing Your Plants for Florida’s Winter Season” – offers more season-specific tips for care and maintenance.
The best way to ensure your lawn, garden and landscaping stay healthy during the winter in Florida is to enlist the help of an expert. Daniel’s Lawn Service & Pressure Washing provides experienced landscape design and lawn care services across Central Florida. Contact us today to schedule your appointment with us! Let our pros do the hard work. It’s what we do best!
How to Prepare Your Central Florida Lawn for Fall
Fall is officially here, and cooler temperatures are on the way to Central Florida! Did you know that fall is one of the best times to assess your lawn’s landscaping needs? It’s important to ensure your yard is properly prepared around this time of year as the temperatures start to decline. We here at Daniel’s Lawn Service want to help you get your lawn primed and ready to go for spring! Whether you’re a novice to gardening or have an experienced green thumb, this blog is sure to help you “spring” into action! Continue reading to learn about your lawn’s needs for the change of the season.
Aerate and Fertilize Your Lawn
Like most people, you may not realize your lawn care regime might be missing a step that could greatly benefit your lawn’s health. The step is aeration. It’s okay if you’ve never heard of it before — since it’s not widely necessary with Florida’s sandy soil — but the process of loosening up your soil can make a huge difference in the way your yard looks come springtime. There are a couple of reasons your yard could use aeration — such as large lawn equipment, heavy traffic flow or a newly constructed home. These situations are known to compress soil tightly together. Aeration does two things: It helps loosen compacted grassroots and opens up the ground so it is more receptive to moisture, fertilizer and seed. Aerating the soil during your fall landscaping will give it a healthier start for the following spring. You can learn more about aeration by reading our blog post, “Why You Should Aerate Your Lawn.”
An article from Briggs & Stratton offer these tips to get you started:
- Start with moist soil (wait 24 hours after a rainstorm or irrigation).
- Choose a tool or a machine that actually removes “plugs” of soil from the lawn, rather than making a hole in the ground. That causes the surrounding area of the hole to compact roots and grass even more, thus defeating the purpose of aerating your lawn.
- Since most machines and tools only cover a small percentage of soil surface, multiple passes might be necessary.
- Once the plugs have dried, they can be broken up and spread over your lawn for a clean appearance (the plugs can be broken up using your lawn mower or by pounding them with the back of a rake).
After aerating your lawn, the next step would be to have your soil tested to determine the kind of nutrients it needs and the balance of the pH level. This will help you to select the proper fertilizer that will support the growth of your plants and flowers.
Florida soil is naturally lacking in nutrients due to its general sandy nature, but that can be fixed with a little fertilizer. October is the last recommended month to fertilize prior to winter. Depending on your plants, you might need to fertilize more often than once a year, so make sure to research the care that your plants need. It’s also important to follow the manufacturer’s directions for use for the best results. Look for a brand that contains a slow release of nitrogen and potassium, and has a nitrogen, phosphorus and potassium ratio of 16-4-8.
Control Weeds and Insect Pests
Different types of weeds, pests and insects can pop up all year long. However, they are easier to get rid of in the fall. By choosing a pre-emergent and/or herbicide and applying it to your soil after aeration is the best way to prevent rapid growth of weeds and keep away pests and insects in the future.
After applying your pre-emergent, you may have to pull out a couple of stragglers after the initial application, but if rampant weed growth continues, you will require the help of a lawn service professional. The best time to apply a herbicide or pre-emergent is when the weather reaches 60 degrees Fahrenheit or lower for four consecutive nights, around late September and into October. For more advice about dealing with weeds, read our blog post, “Weeding and Feeding Your Florida Lawn.”
When it comes to recognizing if you have an insect infestation, look for brown patches or any discoloration in your yard. Some of the insects to watch out for during the cooler months include:
- Fall armyworms
- Mole crickets
- Sod webworms
- Southern chinch bugs
Treating for these pests needs to be done quickly, before they cause lasting damage to your lawn. If you are looking for earth-friendly pesticides that are non-toxic to humans and animals, you can visit a list we have provided on our blog post — “Earth Friendly Pesticides” — for natural ingredients that can be used to mix your own pesticides.
Perform Seeding and Overseeding
While overseeding may sound like a bad thing because of its name, it actually refers to the process of spreading seeds over the ground — typically over a patch of thinning grass. This process reduces the rate of aging and the decline of the turf itself. Overseeding is used in conjunction with aeration because it allows the seeds to reach closer to the already existing root system, providing the seed-to-soil contact that allows seeds to germinate and sprout.
Homeowners often ask if they can just toss a handful of seeds over a thinning patch, but without aeration, the results won’t yield much due to the seeds not being able to germinate properly. Overseeding helps retain the soil’s moisture, return nutrients to the grass and prevents weeds from growing due to the thicker grass. It’s also very cost-effective while producing amazing results if the process is done correctly.
Seeding occurs when you have an expansive area of bare or fresh soil to work with rather than a thinning, already turfed patch. Whether the soil is fresh or bare, seeding works great to rejuvenate the area with a vibrant area of grass. A good rule of thumb is that the less seeds you use, the longer it will take to knit in and the longer it takes to knit in, the more susceptible to weeds your lawn will be.
Both of these methods require technique and timing. The best time to seed in Central Florida is in the fall, since the cooler temperatures will make better conditions for your new growth. If you’re unsure about your ability to seed or when to seed, it’s best to contact a lawn care professional.
Plan Ahead and Plant for Spring
Fall is the best time to consider the plants you want to have growing by spring. You can also decide which herbs and vegetables to plant for winter. We found this list from Gaston Mulch of climate approved plants, herbs and vegetables to help in your decision:
Plants:
- Calendula
- Chrysanthemum
- Dianthus
- Firespike
- Geraniums
- Holly
- Impatiens
- Petunias
- Salvia
- Snapdragon
Herbs/Vegetables:
- Broccoli
- Carrots
- Celery
- Chives
- Cilantro
- Garlic
- Green onions
- Lettuce and kale
- Parsley
- Sage
Fall is the perfect time to consider planting more delicate, young plants so that they can develop good root systems before the humid, summer months roll in. For more information about taking care of your lawn during the cooler months, read our blog post, “Taking Care of Your Lawn in the Fall.”
Ensuring your yard is properly maintained and taken care of is a big job that requires time and commitment, not to mention a lot of time on your knees, to keep your design flowing all year long. If you dream of your own slice of Central Florida paradise, but don’t have the time or energy to keep up with it, call our lawn experts at Daniel’s Lawn Service & Pressure Washing. We provide professional lawn care and landscaping services throughout Central Florida, including the Seminole County cities of Lake Mary, Longwood and Sanford. We have decades of experience treating Florida lawns for their needs in all seasons, and we would love to treat yours, too! Our full-service company provides landscape design, tree installation, tree trimming, yard maintenance, pressure washing and so much more. Contact us today!
Plan Your Landscape Design for the Long Term
Whether you’re moving into a new home or simply ready for a change to your yard’s landscape, the best place to start is with a design that plans for the long term. Making a plan that takes into account your entire property will result in an aesthetically cohesive, pleasing effect, and will also help you avoid the pitfalls that can result from planting in a random fashion. While it’s tempting to fall in love at the plant nursery or home improvement center and buy — and plant — on impulse, you’ll save money and enjoy more functional outdoor spaces when you approach landscaping with a purpose in mind.
This plan should factor in any hardscapes, patios, walkways or trees that can be utilized best in your space. It should also factor in themes, overall look, gathering areas and how everything comes together in the final drawing.
One of the most common mistakes homeowners can make is to skip this step. According to Howard Roberts of Liquidscapes, Inc.,“Too many times over my 36 year career I have seen homeowners try to skip the design process, which has cost them dearly down the road by not thinking the ‘Big Picture’ through. Or they piecemeal it and hire individual companies to perform separate services related to the project, but nothing seems to come together in the end because no one was steering the ship.”
Our blog post — “How to Avoid Common Landscaping and Yard Care Mistakes” — covers this issue in greater detail to help you avoid a rocky start on your landscape design plan.
What to Consider When Planning Your Design
As mentioned earlier, there are many considerations when planning long-term for your yard. The University of Florida’s Gardening Solutions website provides some important factors to look at before buying that pretty plant you saw at the nursery.
Know your yard — This includes the average temperature, the type of soil you have, and your yard’s terrain. You’ll also need to consider the four types of microclimates that range from deep shade to full sun. Using the USDA Plant Hardiness Zone Map is a great place to start.
Think about who will be using your yard and how they will use it — For example, will children be using your yard? Do you have pets? Are you hoping to use your yard for outdoor entertaining? Remember, you can create different spaces for different uses in your landscape using strategic plantings and hardscapes. Walkways can be used to move people from one area to another.
Think about care and maintenance — Since you will be maintaining your yard (or hiring someone to maintain it), consider your maintenance style and budget. How much time will you really have to put into your landscape? Or if you won’t have the time, will you be able to afford to hire a lawn care service? How much do you have to invest in your landscape? Determining the answer to these questions will help to ensure the success of your landscape for years to come.
Think about themes — A good place to start is by looking at the architecture of your home. Try to complement the lines and style of its architecture in your yard; after all, your yard is an extension of your home. Themes can help guide how you place and select plants, decorations, hardscapes, and structures. Do you want neat, geometric shapes and structures in your landscape? Do you want softer lines and a more natural feel to your space? Do you want a landscape to include only specific colors? Asking yourself such questions will help you choose a unified theme for your garden.
Popular landscaping themes in Central Florida include tropical, country gardens (which includes butterfly gardens), and Florida paradise (think azaleas and other Florida-hardy plants).
Link spaces — It’s important to maintain balance in your yard and keep the flow moving. Using pathways is a great way to lead your guests through the “rooms” of your backyard.
Make your plants work for you — Plants can provide you with fresh fruits and vegetables, beautiful scenery, lovely aromas, privacy, and much more.
As the University of Florida notes, “Plants can be used as barriers to define areas within your landscape as well as identify where your landscape ends. You can use plants to create physical barriers in your landscape by blocking both views and access to an area. If you want to keep your views open, but maintain some barriers, low growing plants can be used to create implied barriers, blocking access but not the view.”
Structure — Structure is at the heart of a successful landscaping design plan. According to the University of Florida, “Consider your various visual planes when selecting plants. Starting from the area above you, think about the overhead plane, this might include archways and trees. Moving on to the vertical plane, consider how closely spaced or far apart plants will be, how plants will be layered or staggered (generally larger plants are used behind smaller plants), as well as the individual and massed heights and widths of your plants.
“Don’t forget about the ground plane (including how smaller plants will be grouped and arranged as well as groundcovers and hardscapes). Repeating similar shapes and structures in your garden will give you a unified view throughout your space.”
Highlight — Draw attention to a specific area in your landscape with unique plants, structures, sizes, or colors that capture the eye.
Ensuring your yard comes together completely depends on many small details. Consider how the visuals of your yard balance each other to create a cohesive landscape. Also, take into account how the passage of time will affect your landscape plants. When selecting plants, make sure you consider the plant’s growth rate, maintenance needs, and eventual mature size. Make sure you provide your plants with enough room to reach their mature size. Last — but certainly not least — by choosing resource-efficient plants, consciously managing water, and choosing environmentally sound hardscapes, you can help protect and preserve the environment.
Planning for Shade Trees
Shade trees can provide a natural, leafy barrier between Florida’s relentless summer sun and your recreational areas so you can relax and enjoy your yard. However, research the tree (or trees) you plan to add. First, locate your sewer line and plant well away from it. Some trees have aggressive root systems that seek water sources. Sewer pipes also carry “fertilizer,” which tree roots seek as a source of nutrition. Tree root intrusion is a common reason for sewer pipe clogs. Without intervention by a plumber, the roots can eventually break the pipe.
Other concerns in Central Florida are hurricanes and severe summer thunderstorms that can topple diseased trees and break off limbs that crash through the roof or windows — in addition to causing other types of property damage. Be sure you know the eventual height and crown diameter of the tree to avoid overhanging branches.
Our semi-tropical climate is friendly to a wide variety of shade trees. However, the following five species are especially well-suited for thriving in Central Florida.
It’s important to select trees that are capable of surviving in Central Florida temperatures.
- Bald cypress — Unique because, unlike other coniferous trees, it sheds its leaves in the fall. It’s perfect for medium-sized yards, as it grows 50 feet tall with a canopy range of 25 feet. They prefer moist, sunny spots, but if no water source is around, you can irrigate the tree to encourage rapid growth. Contrary to popular belief, the bald cypress grows well on dry land when properly irrigated. To prevent root damage, leave at least 15 feet between it and your house, or at least 10 feet between the tree and a walkway.
- Southern live oak — Stays green all year, and while it does shed, it’s never bare due to newly developing leaves. Its branches tend to grow at odd angles, so pruning early is essential for uniformed growth. Live oaks grow up to 65 feet tall and have extensive root systems, which makes them stable in storms and windy conditions. They prefer moist, well-drained soil and can tolerate some flooding.
- Florida maple — The Florida maple can grow in full sun or partial shade. It will also tolerate occasional flooding. It requires minimal care as long as it has plenty of water, and can reach up to about 40 feet tall at maturity. One downfall is its roots will breach the surface of the soil. Mulching around the tree, rather than planting grass, can minimize this concern.
- Loblolly pine — Not your average pine tree, as it takes on an ovular appearance and can grow between 60-100 feet with a 30-foot wide canopy. This fast-growing pine prefers full sunlight and can tolerate many types of soil. Small wildlife will be attracted to its seeds for food.
- Tabebuia (trumpet tree) — Produces trumpet-like flowers in many varieties that can vary in color and size — pink and purple being the most popular choices. Depending on the variety, the tree can grow to be anywhere from 25 feet tall to 160 feet tall. It prefers full to partial sun and can tolerate most soil types. Regular pruning is required to keep it healthy.
Planning for Maintenance
Planning for future maintenance might seem daunting, but we return to Howard Roberts, who offers these three sage pieces of advice. Following them will help you account for every possibility in your design to ensure you conserve money, time, and resources.
- Run extra conduit underneath patios and pathways. This will make it easy for you if you ever choose to add lighting or change your irrigation setup. This is a very inexpensive cost if you plan ahead of time, but not if you do it later.
- Leave room for machinery such as a riding mower to access your backyard. Removable fence panels, wide gates, and an access path will make it easier to maintain your landscape.
- Plan for maintenance. Just like your home, your landscape needs regular maintenance in order to look its best and function well. Make sure you understand the maintenance needs of your new landscape before you install plants, hardscape, etc., to ensure you’ll be able to keep up your investment over time.
It’s very important that your landscape design enhances the beauty and function of your property, and as long as you follow these steps, you are sure to succeed. Now that you know what’s involved in landscape design and would rather leave it to the pros, our experienced, talented team at Daniel’s Lawn Service & Pressure Washing, Inc. can work with you to achieve your goals and bring your vision to life! Our full-service company provides tree installation, tree trimming, yard maintenance, pressure washing and so much more. Contact us today!
Landscaping Ideas for Your Central Florida Pool Area
Are you looking to spice up your pool area? The right landscaping — or poolscaping — can make a big difference! Poolscaping is a term used to describe how the area around a pool is enhanced to complement the pool itself. Whether you want to establish a resort-like feel or something more casual, the plants and the locations you choose for them go a long way in setting the desired mood for your slice of Central Florida paradise!
What to Consider When Choosing Plants for Your Pool Area
In addition to creating an attractive, inviting environment conducive to relaxation, recreation and entertaining, you’ll want to select plants that will thrive in their environment. While this is basic advice for all types of landscaping, pool areas have somewhat different considerations. For example, you need to be careful about which plants you place close to the pool itself. Some varieties are sensitive, and could be affected by pool chemicals from splashing water.
When selecting a plant, make sure the area provides the light and soil conditions the specific plant needs to prevent growth issues, and know the plant’s mature size so you can plant in an area with adequate space. This is especially important when planting within a screened enclosure.
Additionally, make sure the chosen plant’s root system won’t cause problems with the foundation around the pool. Avoid trees with aggressive root systems that seek out water, such as willow or ficus. For pools without a screen enclosure, avoid installing deciduous trees — which drop leaves in the autumn — or pine trees, which also shed in fall. Needless to say, those leaves and pine needles wind up in the pool, and can clog pool equipment! This is as good a time as any to recommend you call us to trim overhanging branches that add to the debris in your pool or roof gutters.
If you have a more elaborate outdoor area, consider such factors as suitability for the patio feature they’re meant to accent. Plants with overhanging leaves or fluffy inflorescences — such as muhly grass — should not be used around fire features. When poolscaping for an area with multiple defined zones — such as an outdoor kitchen, dining, shade structure (gazebo), etc., make sure that the plantings aesthetically work together to create an attractive, cohesive environment.
You also need to consider the comfort and safety of those enjoying the pool area. Cactus varieties can be a good choice, as long as they’re planted away from high-traffic areas where people or pets could brush against the needles. In general, any plant with needles or thorns should not be placed in close proximity to where people will gather.
Of course, you’ll want to install low-maintenance plants. If you do your own pool maintenance, you already work hard enough! Even if you have a pool service, choose plants that require minimal care. Look at Florida native and Florida-hardy plants, such as croton, hibiscus and pygmy date palm — to name but a few. Our blog post — “Landscaping with Florida Native Plants” — offers some good ideas to get started!
Best Plants and Trees for Central Florida Pool Areas
We’ve already dropped a few names of plants and trees that will enhance your poolscape. Others include the following:
- Hosta
- Spineless century plant (Agave attenuata)
- Areca palm
- Jade
If you’re going for a tropical feel, consider a bird of paradise. It’s the quintessential Florida pool plant, adding island flair whether planted in a container or in-ground. There are two varieties: orange (Strelitzia reginae) and white (Strelitzia nicolai). The orange bird of paradise is more common in Central Florida, and more versatile than its white counterpart, which reaches a mature height of 20-to-30 feet — making it more suitable for open areas as opposed to pool enclosures. As the white bird of paradise can easily tower over a single-story house, it’s best recommended for a two-story residence.
Consider ornamental grasses for additional privacy and color. Purple lovegrass (Eragrostis spectabilis) grows from 1 to 3 feet tall and wide, producing reddish-purple flowers throughout the year. Native Florida gama grass (Tripsacum floridana) grows 2 to 4 feet tall and wide, producing yellow flowers in summer. Both perform the best when planted in full sun and in well-drained soil.
Gardening writer Lisa Hallett Taylor provides some great suggestions and inspiration in her article for The Spruce on poolscaping, with valuable in-depth information for those interested in learning more.
Great Landscaping Ideas for Enclosed Pools
Pool enclosures protect against mosquitos, animal intrusion and plant debris. However, they pose a challenge to come up with poolscaping ideas that unite your enclosed pool with its surrounding landscape.
Container plants are an easy, low-maintenance solution. They can be placed in a variety of locations, and the containers themselves add texture and visual interest. One popular container plant is the Creeping Jenny. Its small, round golden-green leaves drape over the sides and cascade down the container. Creeping Jenny can be planted on its own, or as an underplanting for a taller container plant. It needs partial sun and well-drained soil, so be sure that the requirements of any “container mate” are the same.
All Seasons Pools offers the following suggestions for enclosed pools:
- Plant flowering shrubs instead of large arrangements of flowers. They are easier to care for than most varieties of flowers and offer plenty of vibrant greenery.
- If you do decide to plant flowers, choose perennials, as they should come back again each year, keeping you from having to replant new flowers the following year.
- Use self-watering reservoirs or a self-watering drip system to keep your potted plants watered. This saves you the trouble of frequent watering and saves your plants from neglect when life gets busy.
- Underplant potted trees with flowering vines and ivy to bring in more color.
- Avoid placing potted trees too close to the water. This will cut down on the amount of foliage and other debris that ends up in your pool.
- Add color variety by choosing large-leafed plants in a range of hues like purple leaf alocasias or red leaf bromeliads and philodendrons.
- If you have grass in your enclosure, consider replacing it with gravel, stones or mulch.
- Look up! Hanging baskets can add visual interest at a higher level.
The Take-Home Message
Your pool and patio are much more than your personal oasis — they’re your family’s center for relaxation and recreation. If you’re ready to enjoy them more and work less on their maintenance, call us at Daniel’s Lawn Service & Pressure Washing! We can plan the perfect poolscape, install trees and plants, and maintain them — so you can sit back and relax … or splash around … or float … or sip a cool drink … or show off your grilling skills!
No matter which area of your property you want to improve, we can handle all of your landscaping needs. We also provide pressure washing services to clean your walkways, decks and exterior walls. Visit our Photo Gallery to see our work for yourself. Our experienced professionals take pride in making your Central Florida lawn the best on the block! All you have to do is pick up the phone and call us today!
Palm Tree Care and Feeding
The towering sabal palm is Florida’s state tree, but did you know that palm trees aren’t actually trees at all? In fact, they are monocots (grass-like plants). You might think that palms are easy to grow, considering the abundance of them throughout Florida. Our blog post — “The Best Trees to Consider for Your Landscaping” — notes that you may know a small handful of palm species, but there are a vast number that can thrive as part of your landscape design.
While palm trees are usually hardy, they do require a certain amount of maintenance in order for them to achieve full growth and be healthy. So if you already have palm trees on your property or are considering planting one or more, keep reading to learn to recognize signs of poor nutrition in palms, how to fertilize them and everything else you need to know about caring for your palm!
Signs of Poor Palm Tree Nutrition to Look For
Palm fronds hold the most readily observable signs of distress due to poor nutrition. Left unaddressed, nutrient deficiencies can lead to defoliation and eventually death. Older foliage that turns yellow-to-orange indicates a magnesium deficiency. But don’t be deceived into thinking all is well if the new foliage is green. This growth will also soon change color, and new shoots will wither. According to landscape designer Darcy Larum, palms are especially prone to magnesium deficiencies. Larum also notes that yellow-to-orange spots on all of the palm’s foliage is evidence of potassium deficiency.
Symptoms of nitrogen deficiency include the yellowing and dropping of leaves and poor growth. This is most likely to occur in soil that is low in organic content, although nitrogen loss can also be caused by erosion, runoff and leaching of nitrate.
How to Fertilize Palm Trees
Fertilizing your palm correctly is a crucial part of ensuring successful growth. This is because sandy soil doesn’t hold on to nutrients as well — especially during periods of heavy rain — leading to the nutrient deficiencies mentioned earlier. The best way to make sure your palm tree has enough nutrients is to use a slow-releasing fertilizer that is specially formulated for palm trees.
These slow-release fertilizers are available in granules, pellets and spikes that deliver small doses over time directly to the palm’s roots. Over-fertilizing your palm tree can be just as harmful as not fertilizing, so it’s important to follow label directions. Kurt Kmetz — founder and editor of Florida Landscaping Today — recommends fertilizing in spring, summer and fall.
“The best way to apply granular fertilizer for palm trees is to broadcast it,” writes Kmetz. “When fertilizing palm trees spread it evenly underneath the canopy (leaf spread) starting one foot away from the trunk and spreading it out to and around the leaf spread.
“Do not pile it up against the trunk itself where new roots can be damaged. Do the best you can if there is limited space around the palm tree, due to its location in the landscape. Make sure the palm fertilizer is watered in after application.”
Should You Prune Your Palm?
As the University of Florida’s Institute of Food and Agricultural Sciences (UF/IFAS) points out, some palm trees — such as the cabbage palm — are “self-cleaning,” and shed old fronds on their own. For those that aren’t, you may choose to prune them periodically. Just use a pole saw to remove any brown fronds, or hire a lawn care professional to do the job.
Florida newcomers may assume they need to proactively prune tall palm trees to prevent damage from a hurricane. However, this can do far more harm than good! Palm trees are naturally designed to be resilient to high winds (notice how they bend instead of break in two, as do most other trees). Palm trees should only be pruned to remove dead growth.
All About Sabal Palm Care
Our state tree is a great tree any way you look at it! The majestic sabal palm can reach heights of 50 to 70 feet tall. Resistant to insect pests and disease, it’s practically maintenance-free. As a native Florida tree also common to other areas of the southeastern United States as well as Cuba and the Bahamas, the sabal palm is extremely drought and salt tolerant, making it ideal for Florida’s East Coast. It grows best in Hardiness Zones 8 through 15 and is cold hardy, tolerating winter temperatures as low as 15 degrees Fahrenheit — although this isn’t typically a concern here!
According to Executive Landscaping, established sabal palms usually don’t require fertilizing unless soil conditions are especially poor. If this is the case, apply a slow-release palm fertilizer two or four times per year. A deep-soak watering around the base of the palm once every two weeks during periods of drought is sufficient.
If you want to add a sabal palm to your yard but choose a young tree that you can plant yourself (as opposed to a mature tree that would require installation by a tree service professional using specialized equipment), plan on having patience! A sabal palm with 20 feet of trunk could be about 50 years old. As with an oak tree, consider planting a sabal palm as a long-term investment in the beauty and value of your property to be enjoyed by future generations.
For a newly planted young sabal palm, water about two to three times per week for the first six months, making sure that the water soaks the soil around the roots to a depth of 18 inches or so. To get your sabal palm off to the best possible start, mix two ounces of palm tree fertilizer per one inch of trunk diameter into the soil at planting time. Feed it one ounce more per three inches of trunk of slow-release palm tree fertilizer immediately after planting it so that the tree receives the nutrients it needs while it establishes itself.
Thinking of Hiring a Landscaping Professional?
Whichever species — or variety of species — of palm tree you choose to lend a tropical feel to your slice of Central Florida paradise, our team at Daniel’s Lawn Service & Pressure Washing is ready to help with a wide range of services, from landscape design to plant selection, installation and maintenance. We have experience planting trees of all types, and can also recommend the optimal location to plant in terms of soil, light, and aesthetic appeal. Call us today to learn how we can give you the lawn and garden of your dreams!


