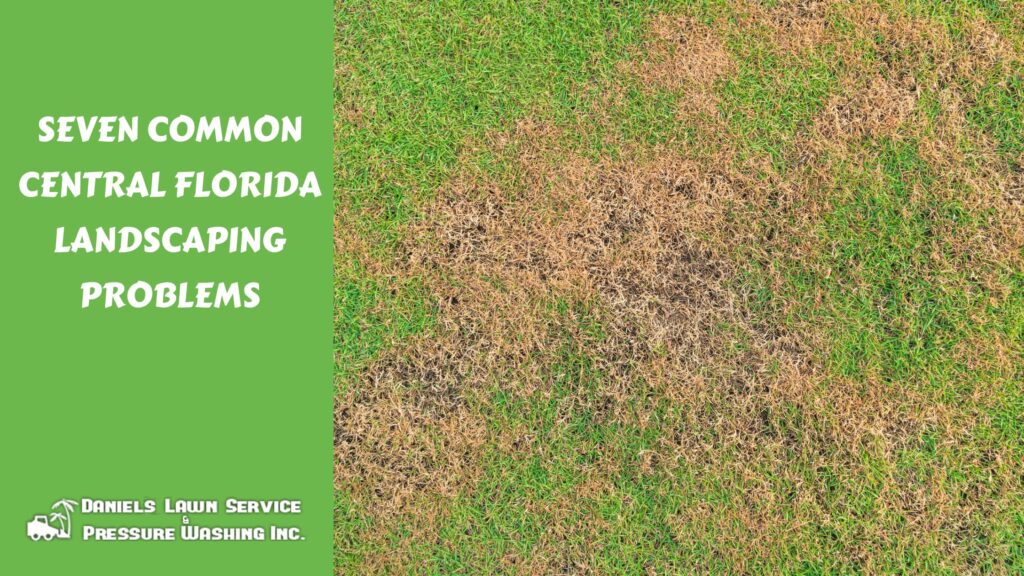
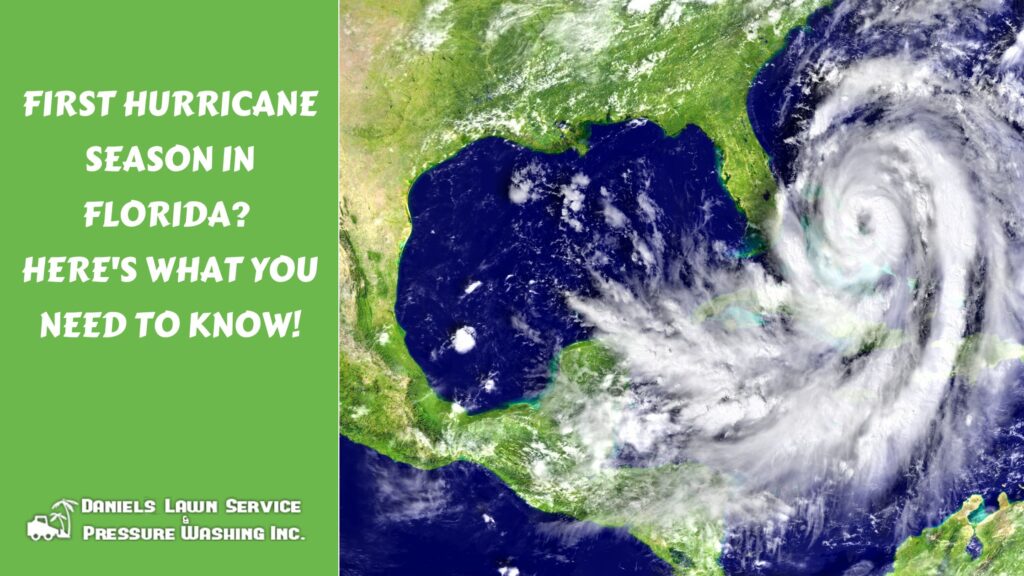
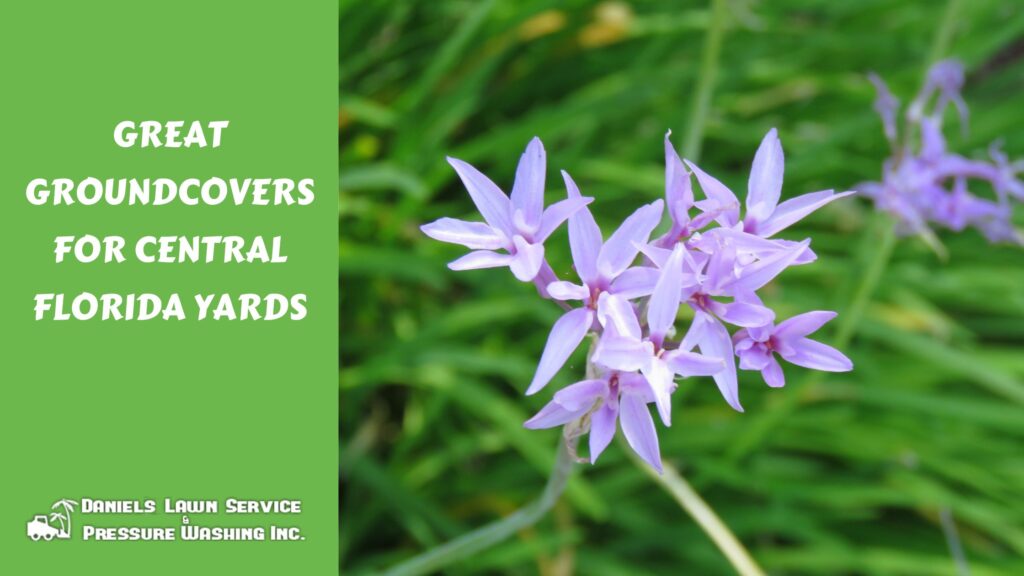
BLOG
First Winter in Florida? We Answer Your Yard and Garden Care Questions!
If you’re a native or semi-native Floridian, jokes about the state’s weather should not be new to you. It is true what they say, though – there are four seasons in Florida, of which three are summer. This has earned Florida its well-deserved official nickname, “The Sunshine State.”
However, the charms of our lovely state have recently attracted numerous new residents. So if you’re among them, we extend our (of course) warm welcome! Florida experiences one of the mildest winters in the United States. Daytime highs range from 62 °F in Tallahassee to 77 °F in Miami, while average lows range from 41 °F degrees in Tallahassee to 65 °F in Key West. Central Florida is in the sweet spot, with average daytime highs of 72 °F and lows of around 52 °F.
If this is your first winter here, you probably have plenty of questions about caring for your yard and garden. But first, let’s deal with the common misconception that Florida doesn’t get cold enough to necessitate special preparations. Winter temperatures in Florida can get low enough to damage subtropical, tropical and even temperate plants if they are not adapted to lower temperatures. A single night of cold and freezing wind can cause damage. Even though winter lawn and garden protection in Florida need not be as rigorous as in northern climates, some reasonable precautions must be taken to ensure that your lawn, landscape plants, shrubs and young trees survive the season, and remain healthy all year long.
Do I Need to Modify My Lawn Care Routine?
As our blog post – “How to Winterize Your Central Florida Lawn” – explains, treating your lawn in the winter the same as you do in the warmer months can cause long-term problems that affect its health and appearance. Here’s what you need to know!
Adjust your mowing schedule – As Challenger Irrigation recommends, leave your grass taller than you do in the summer months. Taller grass protects the roots from cold weather.
Adjust your watering routine – Because your lawn grows slower in the winter, it doesn’t need as much water. The other extreme is under-watering, which also can make it hard for your lawn to thrive. Strive for a balance instead. At most, only irrigate your lawn one day a week in the winter. If you’re not sure your grass needs water, check to see whether or not it springs back up after stepping on it! Flat grass means it’s time to water.
Don’t fertilize after October (with one exception) – You may look at brown spots on your lawn and assume it needs an application of fertilizer to green up again. Fertilizing your lawn in the winter months will make it grow, but your lawn will also become more sensitive to cold. This means that any sudden cold snap can instantly kill your grass and ruin any lawn care progress you had been making up until that point. Wait until spring to fertilize.
If you want a green, vibrant lawn throughout winter, consider overseeding it. This process involves seeding a temporary grass – such as ryegrass – over your existing lawn. According to UF/IFAS Gardening Solutions, ryegrass should be sown once daytime highs have fallen to the low- to mid-70s. The ryegrass will die back come spring. Rake the grass to remove all debris, then mow your lawn before sowing the seed. You’ll need to water your overseeded lawn frequently until it has germinated. Once the winter lawn is established, it will require watering, mowing and fertilizing.
Does it Freeze in Florida? Do I Need to Protect My Plants?
Short answers: yes, and yes. Although we are spared the Arctic-like temperatures of northern states, nighttime temperatures can plunge enough to necessitate covering sensitive plants. Many shrubs, perennials, annuals and even some trees are susceptible to temperatures that are considered a light freeze (29° to 32° F) back home. This is especially true for such tropical plants as sago palms and hibiscus, which grow and thrive here, but are overall better suited for South Florida’s climate. Interestingly enough, sudden freezing temperatures after prolonged warm weather can do more harm to your plants than long-lasting freezing weather!
To help ensure your sensitive plants live to brighten your yard in spring, follow these steps. Our blog post – “How to Protect Your Plants From Freeze” – covers this topic in greater detail.
- Add extra mulch around sensitive plants when a freeze is forecast. This helps trap the soil’s heat.
- Water your sensitive plants early in the day before a forecasted freeze. This allows the soil to absorb warmth from the sun and warmer daytime air, thereby helping plants survive the cold. Also, cold winds are drying, taking a toll on plants that are already too dry.
- Cover vulnerable plants with frost cloth. This is an insulating material of woven fabric created specifically to protect plants from freeze damage. It’s available at plant nurseries and home improvement centers, as well as major online retailers. Completely drape the plant from the top all the way to the ground. Apply the cloth right before sundown to make sure the cloth gathers the heat produced in the ground during the day. Be prepared and buy frost cloth in advance, so you’ll have it on hand when needed.
- Try to bring potted or container plants indoors, or at least bring them closer to each other. Add mulch around the plants to trap heat at the surface if they need to stay outdoors.
I’ve Never Seen Some of These Plants Before – How Can I Tell if They’re Freeze-damaged?
If you’ve never had a yard graced by a hibiscus or bird of paradise before, you may wonder if they’ve suffered freeze damage. Our blog post – “Preparing Your Plants for Florida’s Winter Season” – provides signs to look for, including the following:
- Tropical plants like crotons often drop a few to all of their leaves in cold weather, although they will regrow in the spring.
- Tan, brown or black wilted leaves can be a sign of foliage burn. Leave the damaged leaves until spring, when you can cut them off.
- Fungus, which shows up as brown spots on leaves. Use appropriate fungicides to treat the infected plants, and spray your plants at the beginning of winter to improve resistance to fungi.
- Unsure if your plants are dead or still alive? Gently scratch the stem to see what color appears underneath. Green is good, but any other color could indicate a dead plant.
Central Florida Winter Lawn Care Made Easy with Daniel’s Lawn Service & Pressure Washing
Central Florida yards need special attention this time of year. Our experienced team at Daniel’s Lawn Service & Pressure Washing Inc. knows the ins and outs of Central Florida’s climate, so your winter yard can be as beautiful as your spring and summer yard when it’s under our care! We will work with you to achieve your goals and bring your vision to life every season of the year! Our full-service company provides landscape design, tree installation, tree trimming, yard maintenance, bush hogging, pressure washing and so much more. Contact us today so we can do the work, and you can do the enjoying!
Plants for November in Central Florida
Each season gives Central Floridians something new to add to their yard. For those who’ve recently moved from areas that have four distinct seasons, you’ll be pleasantly surprised to learn that fall and winter are also growing seasons – although somewhat different from spring and summer! You can experience the joy of watching your garden come to life with an array of fresh colors, fragrances, and even produce.
The right choice of plants can ensure that your garden is blooming all year long. Thanks to our excellent climate, it is possible to grow a wide variety of perennials and flowering shrubs to enhance your landscape, and flavorful vegetables and herbs for your favorite recipes. If you are looking to get into Central Florida gardening, here are some handy tips for you!
Cool-weather Bedding Plants to Brighten Your Garden
Often, people tend to believe that winter is the season to completely stop gardening or planting. The cold weather conditions may lead many to believe that plants cannot thrive in such temperatures. However, this is an absolute myth. The right choice of plants and an expert lawn service provider can ensure that your garden is in full bloom even in winter. The following recommendations are provided courtesy of Costa Farms, Tree Care by Robert Miller, Inc., and University of Florida IFAS Extension. Our blog post – “Brighten Your Winter Garden with Colorful Annuals” – provides additional suggestions.
Bedding plants such as snapdragon, pansy, ornamental cabbage, cape daisy, and impatiens can thrive in your garden. If you want to spruce up your landscaping to look like a little slice of paradise this season, you can also add a cool-weather bedding plant like violas. These plants are sure to boom throughout the entire course of the winter. You may also go for planting bulbs during this time to add another dimension of beauty. In that case, you can opt for planting amaryllis, which resembles a quirky trumpet shape.
Alternatively, you can also choose to line your driveways and flower beds with crinums. Citrus trees and flowering azaleas are excellent planting options. A word of caution, however – some people are sensitive to the pollen that blooming azaleas produce from late February to early April. If you have seasonal allergies, you may want to rethink this choice, beautiful as it is! Additionally, you can add some extra interest and functionality to your garden by planting the following:
- Mums in containers: Mums are a convenient option for garden plating in November. They can be planted in containers and therefore, can be placed anywhere you want. They can add a pop of color to the greenery.
- Vegetables and herbs: Vitamin-rich plants like spinach, kale, and arugula can be a gem of an addition to your November garden. Plant carrots and lettuce for an optimum harvest. To enhance their flavor in recipes naturally, make some room for parsley, thyme and sage.
November Yard Care Tips
While other states are experiencing nearly freezing temperatures in November, Central Florida’s subtropical climate provides cool, dry weather that is great for many plants. As the weather cools, your plants will require less supplemental watering. For this reason, you must pay attention to adjusting your regular irrigation schedules.
The key to getting a healthy, flowering garden in Central Florida’s November is to understand the soil type in the region. Did you know that Florida has an official state soil? It’s called Myakka, and consists mainly of sand, which makes it low in nutrient quality. So, you can go for containers full of potting soil or add compost to the native soil to make it more viable for planting.
Do You Love Poinsettias? Here’s How to Grow Them Year ‘Round!
If you are going to be gardening to your heart’s content in November, you must not miss out on the beautiful poinsettia plant. It is an extremely versatile plant that can grow throughout the year with the proper care. Poinsettia is a plant synonymous with Christmas cheer. It is often used as a thoughtful gift to friends and family during the holiday season. It makes for an ideal plant for Central Florida gardening.
The history of poinsettias is as intriguing as the plant itself. It is a native plant of Mexico and was brought to America by the first U.S ambassador to that country, Joel Roberts Poinsett. The scientific name of the plant is Euphorbia pulcherrima, which translates to “very beautiful.” This is a rather fitting description of the plant itself. Poinsettias can take on hues ranging from a vibrant red to a soft pink, orange, white, or even purple.
If you, like many others, love the poinsettia and want to grow it in your garden, here are some tips to extend their life beyond the holiday season, courtesy of the University of Florida Institute of Food and Agricultural Sciences (UF/IFAS):
- Temperature and sunlight: Always remember to shelter your poinsettia plant from cold temperatures and chilly air. If they are to bloom and maintain their color until March, you must keep these plants away from any frosty conditions. A well-lit area patch in your garden will be the most suitable spot for this plant, provided it is not exposed to direct sunlight. Any hot light or the glare of direct sunlight can dry out a poinsettia easily.
- Watering: Poinsettias are delicate plants. So, be mindful of watering them just the right amount. Add water to their containers only when the soil surface appears to be dry to the touch. If the soil becomes too soggy, consider draining it out with the help of a saucer placed under the container. It is important to remember that over-watered soil can be deadly to fragile poinsettias. An occasional misting of the plants using a sprayer can help in their growth by making the air humid.
- Planting: With the right care techniques, poinsettias are ideal for planting in November, even though most poinsettia lovers tend to keep them potted for display until after December. You must only add fertilizer once you are ready to take them outdoors. When winter is over, you can prune the poinsettia and remove all worn-out bracts. When planted in well-drained, moist, and fertile soil, this holiday favorite can grow out beautifully. Trimming the plant regularly in the summer will help it to bloom better in winter. Always remember to keep it away from artificial light in the fall season for optimum bloom.
Your Central Florida Lawn and Garden Experts
If this is your first fall in Florida, welcome! We hope that living in the Sunshine State is everything that you’ve dreamed of! If you’ve been here a while – or are actually a Florida native – we hope we’ve given you some ideas and inspiration.
Our Central Florida lawn care experts at Daniel’s Lawn Service & Pressure Washing can keep your yard thriving and attractive during fall, as well as the winter months ahead! Our experienced team can work with you to achieve your goals and bring your vision to life every season of the year! Our full-service company provides landscape design, tree installation, tree trimming, yard maintenance, bush hogging, pressure washing and so much more. Contact us today so we can do the work, and you can do the enjoying!
Lawn and Garden Tips for October
The arrival of fall in Central Florida means brisk mornings and dryer weather. But what does it mean for your lawn and garden? As it turns out, October is the perfect time of year to take stock of your yard’s landscaping needs and make the preparations necessary to set it up for success in spring! We’ll cover the essentials, and even recommend some beautiful plants that provide a pop of color for the season. Best of all, most are perennials, which means they’ll be an asset to your property throughout the year!
Do You Need to Fertilize in Fall?
October is your last chance to fertilize before grass goes dormant for the winter. As our blog post — “Preparing Your Florida Lawn for Fall” — points out, waiting too late into fall or winter prompts your grass to grow when it shouldn’t. This could make your grass too sensitive to cold temperatures – and as a result, unable to grow properly in the spring and summer months. If you have St. Augustine grass, the only time you should fertilize later than October is if you choose to overseed your lawn — generally once in December and once in February before spring.
Our team at Daniel’s Lawn Service & Pressure Washing recommends you have your soil tested before fertilizing so you’ll know the specific nutrients it needs, as well as how much of those nutrients are needed. No matter the season, Florida’s sandy soil is nutrient-poor. In general, however, look for a fertilizer brand that contains a slow release of nitrogen and potassium, and has a nitrogen, phosphorus, and potassium ratio of 16-4-8. To get the best results from fertilizing, aerate your lawn before applying. This leads to our next section.
When to Aerate, Mow and Water Your Central Florida Lawn
According to Pyle’s Lawn Service, aerating the soil keeps it from getting compact, and supplies roots with water, oxygen, and nutrients. Although Florida soil tends to be looser and more sandy than soil in other states, aeration during your fall landscaping will give your grass a healthier start for the following spring. Our blog post — “Why You Should Aerate Your Lawn” — describes this process in greater detail. Aerate when soil is moist, but wait 24 hours after a heavy rainstorm or irrigation.
Because your grass may not grow as fast as it did in spring and summer, you could only need to mow twice monthly instead of once weekly. It’s important to cut carefully in cold weather by allowing your grass to grow just a little bit taller than in warmer months. This will protect the roots of the grass from the harshness of cool temperatures. Common Florida lawn grasses like St. Augustine and bahiagrass should be kept at about three-and-a-half to four inches, although some other grasses may be better kept at two to two-and-a-half inches tall.
As for watering, the good people at Challenger Irrigation offer the following advice:
“You may have watered less during the rainy season. Make sure your irrigation system is in good working order heading into the fall. Grass may grow year-round in Florida, but it will slow down and require less water in cooler weather. Don’t halt watering, but you may want to water less to avoid over-watering.”
Plants That Add Fall Color to Your Yard
Cooler, dryer months do not mean that you have to forgo a yard filled with vibrant colors. The following plants are recommended by the University of Florida’s Institute of Food and Agricultural Sciences (UF/IFAS) and Sod Depot to add visual interest. For those who enjoy growing their own food, we’ve included vegetables and herbs. If you’ve never tried it before, fall is the ideal season for starting a vegetable garden!
Bedding plants — Pansy, dianthus, and petunia are great for Central Florida’s autumn and winter temperatures.
Bulbs — Agapanthus, rain lily, and other lily varieties will flourish in your garden next spring or summer by planting them now. To make them grow to their full potential, add organic matter to the planting bed.
Coleus — A favorite in Central Florida yards, coleus can be added to beds and borders to create interest and ornamentation. They need fertile, well-draining soil. Planting in partial shade is best.
Stromanthe sanguinea — The shoots of this dramatic plant will create some height to your yard’s sightlines. The rich red color is irresistible any time of year, but in the winter you may see it sport some tall red flowers.
Cassia — If you’re a northern transplant who misses fall foliage colors, the deep golden tones of the cassia’s flowers can ease your homesickness! It grows in well-drained soil that isn’t prone to standing water. Plant three to four feet apart from each other — as well as any other plants. Also grows well in large pots filled with standard potting soil. Plant in an area where it will receive a full six hours or more of daily sunlight.
Philippine violet — Sporting deep green foliage and vibrant purple flowers, the richness it brings to your yard in fall is sure to be appreciated. Plant near a golden-hued plant for a stunning contrast.
Herbs — Parsley, sage, cilantro, chives, and garlic grow great in cooler weather and add a fresh flavor to your recipes.
Vegetables — Brussel sprouts, beets, carrots, and onions all grow and last throughout the winter, making them perfect to include in your garden this time of year.
Your Central Florida Lawn and Garden Experts
Our Central Florida lawn care experts at Daniel’s Lawn Service & Pressure Washing can keep your yard thriving and attractive during fall, as well as the winter months ahead! Our experienced team can work with you to achieve your goals and bring your vision to life every season of the year! Our full-service company provides landscape design, tree installation, tree trimming, yard maintenance, pressure washing and so much more. Contact us today so we can do the work, and you can do the enjoying!
How to Make Your Backyard Dog-Friendly
Does your furry friend long for the outdoors? If your pet spends hours staring out of windows or patio doors, chances are that they do. Unfortunately, you know as well as we do that the world isn’t as safe for your pet as your home is. In a world full of fast cars and tough terrain, allowing your furry friend to roam freely isn’t a good idea. However, there is an alternative! Our experts at Daniel’s Lawn Service & Pressure Washing have gathered information on how to turn your backyard into a personal, secure play zone for your dog! While you may fear for your carefully cultivated garden, “petscaping” is the best way to expand your home to your beloved four-legged friend. Continue reading to learn how to incorporate play areas, pet-friendly plants, and more to give your best friend the quality of life that they deserve!
Create Zones for Your Dog to Play and Patrol
If you’re new to the term petscaping, don’t fret! It’s no different than terms like poolscaping, or an even friendlier term, landscaping. Petscaping is a term coined by Maureen Gilmer, a landscape designer in Palm Springs, California. The idea is to protect beloved animals from poisonous plants and harmful chemicals, while also keeping those cherished landscape plants safe from curious and sometimes destructive pets. Gilmer recommends planting a meadow, complete with tall grasses and perennials, where your prized pet can investigate the terrain, safely and freely. For ideas on the best type of grass to go underfoot of your pet’s paw, visit our blog post, “How To Find the Right Kind of Grass for your Central Florida Yard”.
So what are some ways to help introduce your fur-child to the outdoors? First things first, you’ll want to ensure your backyard is well secured with a quality fence. This will create a solid barrier for keeping your pet in and keeping other creatures out.
Gardening Solutions – a website presented by the University of Florida’s Institute of Food and Agricultural Sciences (UF/IFAS) – recommends following these guidelines:
- Create areas for your pet to run and play.
- Use paths to direct your pet to and away from different areas of your landscape. While a path will not force your pet to go in a specific direction, it can help you train them where they should and shouldn’t be in the garden.
- Use low borders and raised beds for planting areas. While an ambitious pet can overcome these barriers, they still can serve as a deterrent as your furry friend is learning where they can and can’t play in the garden.
- Protect tender plants by creating densely planted areas. Use hardy shrubs and perennials to shield delicate, vulnerable plants.
- Buy plants in 1-gallon pots or larger when adding to your landscape. Having a larger plant to start with will help give it a fighting chance against a curious creature who wants to explore the new addition.
- Look for mulch that is comfortable under the paw and isn’t going to get stuck in the coat and dragged inside. Small cedar chips are gentle on the body while being heavy enough that they don’t get caught up in fur.
As far as what not to do, Gardening Solutions offers advice on that front too!
- Don’t plant landscape plants that could make your four-legged companion ill, or worse. Spanish bayonet isn’t poisonous, but the points of its leaves are sharp and should be kept away from areas where pets will roam.
- Don’t have easily accessible compost. While the idea of your pet playing in compost may seem gross but harmless, it’s actually quite dangerous should your pet decide to eat some of those old vegetables.
- Don’t forget about potentially harmful bugs in your yard, like ticks and mosquitos. You can reduce tick populations by removing leaf litter and keeping turfgrass mowed to the recommended height.
- Don’t forget to check the labels for any fertilizers, pesticides, or any other chemicals you might use in your landscape. Pet-friendly fertilizers and pesticides are often labeled as such.
Creating a safe space for your pets allows them to enjoy the outdoors to their heart’s fullest consent. Go further by researching animal parks and their amenities to give your pet even more activities in your yard!
Dog-Friendly Plants and Plants to Avoid
Dogs are naturally curious creatures. Gifted with a strong sense of smell, they use scents as a way to gauge their surroundings, usually followed by a tasting. They can’t help it. While we may enjoy a variety of plants and leafy greens in our everyday lives, there are also numerous plants that can harm us and the same is true for your furry friend. That’s why as their guardian, it’s important to be informed about the types of plants you expose to your curious K-9. We’ve gathered a collection of the most commonly found poisonous plants, along with their symptoms to include, but you can find a full printable list at ASPCA for both toxic and non-toxic plants for dogs, as well as cats and horses.
Toxic:
- Autumn Crocus: Bloody vomiting, diarrhea, shock, multi-organ damage, bone marrow suppression.
- Azalea: Vomiting, diarrhea, weakness, cardiac failure.
- Bay Laurel: Vomiting and diarrhea; large ingestion of whole leaves can cause obstruction.
- Daffodil: Vomiting, salvation, diarrhea; large ingestions cause convulsions, low blood pressure, tremors, and cardiac arrhythmias. Bulbs are the most poisonous part.
- Dieffenbachia: Oral irritation, intense burning, irritation of mouth, tongue, and lips, excessive drooling, vomiting, difficulty swallowing.
- Foxglove: Cardiac arrhythmias, vomiting, diarrhea, weakness, cardiac failure, death.
- Hyacinth: Intense vomiting, diarrhea, occasionally with blood, depression, and tremors.
- Lily of the Valley: Vomiting, irregular heartbeat, low blood pressure, disorientation, coma, seizures.
- Oleander: Drooling, abdominal pain, diarrhea, colic, depression, death.
- Sago Palm: Vomiting, melena, icterus, increased thirst, hemorrhagic gastroenteritis, bruising, coagulopathy, liver damage, liver failure, death.
The ASPCA warns to be advised that the consumption of any plant material may cause vomiting and gastrointestinal upset for dogs and cats. Plants that are listed as either non-toxic or potentially toxic with mild GI upset as their symptoms are not expected to be life-threatening to your pets.
If you believe that your animal is ill or may have ingested a poisonous substance, contact either your local veterinarian or the APCC 24-hour emergency poison hotline at 1-888-426-4435.
Non-toxic:
- African Violet: Also known as Cape Marigold.
- Baby’s Breath
- Cilantro
- Day Lilies: Note that this is non-toxic to dogs but highly toxic to cats. Symptoms include vomiting, inappetence, lethargy, kidney failure, and death.
- Florida Butterfly Orchid
- Hibiscus
- Orange Star
- Petunia
- Sunflower
- Torch Lily
How to Have a Beautiful Landscape and a Happy Dog
Maintaining a beautiful landscape while making room for your four-legged friend can be challenging if your dog is a digger. Figuring out why your dog is digging can help you solve the problem before your beautiful plants become ruined. If it seems like your furry friend is looking for a cool spot to lay, MyNaturalAwakenings.com suggests following Gilmers’ advice and being proactive by digging a shallow pit where a dog can comfortably fit in a shady spot. Line it with sand to prevent it from turning into a mud pit and keep it damp. In warm weather, a dog can retreat to this cooling-off spot. Other suggestions include a plastic kiddie pool, a post where a dog can mark his territory, and a designated dig spot or sandbox for those rambunctious diggers.
For additional help planning your petscape design, call Daniel’s Lawn Service & Pressure Washing! We have an experienced team of professionals with the knowledge and skills to help extend your little slice of Central Florida paradise with your best friend to keep you both safe and happy in each other’s company. We specialize in lawn maintenance, landscaping, landscape design, pressure washing, and more. Visit our website to learn about our services and contact us today!
Why You Should Remove a Dead Tree From Your Property
When you think of trees, you envision tall, strong trunks and sturdy branches covered with leaves for the sun to peek through. You might see a hammock for relaxing afternoon naps, a tire swing for the kids, or a source of cool shade for your garden. Healthy mature trees increase property value while enhancing the overall enjoyment of your home. But when a tree is dead or dying, it becomes a hazard as well as an eyesore. Unfortunately, a dead tree isn’t as easy (or inexpensive) to remove as a small ornamental shrub – which is why many homeowners tend to leave them in a place far too long. However, if you have one or more trees that are bereft of life, it’s time to literally cut your losses. Here’s why.
A Dead Tree is a Safety Hazard Any Time of Year
The urgency to remove dead trees is typically more pronounced in Florida during the early months of hurricane season, which runs from June 1 through November 30 and peaks in August and September. As those who have lived in the Sunshine State for any length of time know, trees that are dead or diseased to the point of instability can be uprooted by heavy winds and topple over onto roofs, vehicles, etc. Brittle dead branches can snap off and do likewise, and may also become projectiles, crashing through windows and screen enclosures. In addition, if you have a tree on your property that you know is dead, many insurance policies won’t cover damage to your home or car if the tree falls during a storm.
As we mention in our blog post – “Being Prepared for Hurricane Season” – those who were here in 2004 for Hurricane Charley (which made landfall on August 9 as a category 4 storm) remember the damage caused by an estimated total of 28,000 trees uprooted throughout Orlando and Winter Park. Since then, Central Florida communities encourage homeowners to prune old or overhanging branches and remove declining trees to prevent a similar situation.
Just because Central Florida has been spared a direct hit from a named storm in recent years doesn’t mean that a dead tree in your yard poses no safety risk. Not to sound ghoulish, but a dead tree gradually decomposes. A tree may rot from the inside out, making it much more unstable than it might look. As American Cutters states, “Internal wood decay lessens or eliminates wood’s natural strength and flexibility by destroying its lignin (the strong fibers in wood). Without lignin, the wood becomes weak and can break unpredictably.”
In such a case, the tree itself or a branch could fall spontaneously, causing serious property damage, injury, or worse – and you could be liable for damages to a neighbor’s property or personal injury. While Central Florida hasn’t had to deal with full-blown hurricanes recently, our torrential summer afternoon thunderstorms produce gusty winds that create conditions conducive to accelerating the process. Don’t ignore the problem and assume your luck will continue to hold out!
A Dead Tree Can Spread Disease to Healthy Trees and Attract Pests
A dead tree that’s still standing poses additional risks. According to Tree Images, “If your tree died from a disease, it can pass the illness along to your other plants. Tree diseases often present in the form of powdery mildews, which can affect your entire yard. These airborne infections can be extremely difficult to contain once they start to spread, so nipping them in the bud (pun intended) when they are still in a single tree could save your whole landscape.”
Then, there’s the matter of termites. No matter what species a tree is, if it’s rotted or dead, it’s a prime target. Even a dead branch is enough to attract hungry termites. All termites prefer dead and rotting trees because they are very easy to chew through and get to the cellulose. As the good people at Keller’s Pest Control point out, “They thrive in moist, humid environments. Termites love nothing better than a moisture-damaged piece of wood. Considering the fact that our climate is basically humid all the time, Florida is a termite’s idea of paradise.”
Once termites establish a colony in a dead tree or tree stump, it’s only a matter of time before they make their way to your house and wreak their damage on it. Dead trees also provide an attractive home to carpenter ants and other wood-boring insects that can then subsequently infest other trees – as well as your house.
Leaving a dead tree in place can leave your property vulnerable to vermin. According to Evergreen Tree Services, animals may seek out the tree and nest in it. “Rats are known to create nests in dead trees, and when rats are in your dead tree, they’ll eventually invade your home to find food and additional shelter.”
What to Do About a Storm-damaged Tree
Not every tree damaged by a storm needs to be removed. Depending on the circumstances and condition of the tree, restoration may be possible. Gardening Solutions – a website presented by the University of Florida’s Institute of Food and Agricultural Sciences (UF/IFAS) – provides a useful guide to help homeowners determine if a hurricane-damaged tree can be restored, or needs to be removed.
“To be a good candidate for restoration, a tree should not have cracks in its major limbs or trunk. Its roots should not be exposed or lifted out of the soil. In addition, the branches and trunk structure need to have been strong and healthy prior to the storm.”
A tree that needs to be removed may have one or more of the following criteria:
- The lower trunk is cracked or broken. If the main trunk is cracked, then the tree is weak and should probably be removed.
- A large stem has split from the tree. A large branch or co-dominant stem that has broken often leads to massive decay and weakness.
- The tree is leaning towards a target. If a leaning tree is likely to fall on a person, building, power line, or roadway, or is presenting another serious threat, it should be removed. Leaning trees usually have major roots broken and are unstable.
- The tree’s structure was not good prior to the storm. Restoration is difficult for large trees that had poor structure before the storm. Trees with multiple trunks, co-dominant stems, and bark inclusions are all good candidates for removal.
- Large limbs are broken. Trees with many large damaged branches in the canopy (as opposed to branches with only leaves stripped, or trees with only small branches broken) are more difficult to restore. Consider removing these trees.
Whether it’s a damaged or dead tree that needs to be removed, the expense of removal is a real concern. Your homeowner’s insurance policy may cover the cost in order to decrease the possibility of a dead tree falling. Individual policies vary, so read yours carefully, and contact your agent if you have questions.
Should you need to pay out-of-pocket for a dead tree to be cut down, you might be considering whether you can do it yourself – or with the help of friends or family members. We recommend you read our blog post – “The Best Way to Remove a Tree” – for an overview of the equipment and technique required. Overall, however, we strongly advise that you hire a professional. We know we’re getting ahead of ourselves, but Daniel’s Lawn Service & Pressure Washing provides experienced, safe removal of any tree. Most homeowners lack the equipment and personal protective clothing and gear to safely do this – not to mention the physical ability. Even if you’re strong and sturdy, however, cutting down a tree requires more than brawn.
Should you think we’re steering you toward hiring a professional for obvious reasons, this is what American Climbers has to say.
“Removing a dead tree takes much more than simply borrowing a chainsaw and cutting it down. To do it safely, dead tree removal requires planning and organization, skill and experience, and the right equipment. Even if you’ve cut down a tree before, you’ll quickly find out that chopping down a dead tree is nothing like removing a living tree … Where a climber might rig a sound tree and use its crown structure to move from branch to branch, it’s not safe to do that with a brittle, decaying tree. Instead, removing a decayed tree requires specific equipment that is not tethered to the tree, such as a bucket truck or crane.”
As we hope you’ve learned, you have much more to lose by keeping a dead tree on your property than the cost of removing it. When you’re ready to make sure your home is protected over the long term, our team of experts can safely remove any tree. To learn more about our services – including stump removal, land clearing, and landscaping – contact us today so we can do the work, and you can do the enjoying!
How to Care for Your Central Florida Lawn in Summer
Central Florida is the vacation capital of the world, and a great place to live – as we make very clear on our website’s home page! That being said, our beloved summer season isn’t necessarily kind to lawns. Although we’re in the rainy season – which runs from May 25 to October 10 – afternoon thunderstorms provide hydration, but they’re not always consistent. Even a few days without rain can parch grass when it’s subjected to searing sun and triple-digit temperatures. And we probably need not mention how expensive it is to run your irrigation system to keep your lawn alive and green!
The benefits of a healthy lawn go beyond curb appeal. As the University of Florida Institute of Food and Agricultural Sciences (UF/IFAS) Gardening Solutions points out, lawns also cool the air, combat glare and noise, and reduce soil erosion. Perhaps most importantly, a healthy lawn actively filters and traps sediments and pollutants that could otherwise contaminate ground and/or surface water.
Fortunately, it is possible to have a thriving, beautiful lawn in Central Florida throughout summer. But it does take some planning and effort. We’ll cover the top lawn care questions and best practices to help maintain your slice of paradise at its lush, green best!
How Frequently Should You Water Your Lawn?
As mentioned earlier, thunderstorms typically occur during the afternoon and/or evening hours. Paying attention to weather reports is important for reasons other than knowing when to take an umbrella along, as it’s a good rule of thumb to never water your lawn 24 hours before the predicted rain. Overwatering grass leads to a shallow root system since the roots don’t need to extend deep in the soil to find water. This, in turn, reduces your lawn’s ability to tolerate stress – such as drought and foot traffic. Instead, UF/IFAS advises to let your lawn tell you when it needs water. A lawn is ready for watering when it shows at least one of the three signs of lawn thirst:
- Folded leaf blades
- Blue-gray color
- Footprints are visible in the grass (the grass isn’t springing back)
Water once or twice a week during the summer months, and once every two to three weeks over the winter. As for the optimum time of day, UF/IFAS recommends early morning, which allows the leaf blades to fully dry during the day. Although UF/IFAS advises against watering in the evening because it could increase the grass’s susceptibility to disease, it may be the only time you’re able to irrigate. However, never irrigate from mid-morning to late afternoon, as the water will quickly evaporate in the heat. Also, check with your municipality or county for summer watering restrictions.
So how much water is enough? Throughout most of Florida, ½-to-¾-inch during a single irrigation session should suffice. Sandier soils will require more, while denser soils need less. If you’re not sure about the amount of water you’re using, place straight-sided cans – such as coffee cans – around the perimeter of your irrigation zone, and see how long it takes to fill the cans to ½-or-¾-inch. This will tell you how long to run your sprinklers each time. Check your rain sensors frequently to make sure they’re functioning correctly.
Mowing Tips to Protect Your Grass
Mowing is perhaps the most important lawn maintenance task. As the grass grows more rapidly in summer, expect to mow weekly – or at least, every two weeks. UF/IFAS recommends mowing at the highest recommended height for your grass species.
- Bahia grass: 3.5 – 4″
- Centipede grass: 1 – 2″
- St. Augustine grass: standard cultivars, 3.5 – 4″; semi-dwarf cultivars, 2 – 2.5″
- Zoysia grass: The majority of these cultivars should be mowed at 1.5-2″
Never remove more than one-third of the leaf blade – While it may be tempting to do so in the summer, “scalping” (mowing too low) can badly stress your turf, leaving it vulnerable to disease, drought, and insect or weed invasion.
Leave grass clippings on the ground – These act as compost, returning valuable nutrients to the lawn. They add organic matter to the soil, thereby reducing the need for fertilizing.
Keep mower blades sharp – Dull mowers tear leaf blades, stressing the grass and making it more vulnerable to pests and disease.
Do not mow when your lawn is wet – Wet grass clippings keep your mower blades from making the cleanest possible cut.
If you do miss a mowing, bring the height of the grass back down to the recommended level slowly. Raise the mower height so you don’t remove too much leaf tissue at once.
But before you mow, you have to grow. And choosing the right species of grass – known in agricultural circles as turfgrass – can help you have a low-maintenance lawn that works best for your yard’s conditions and your lifestyle while still looking great! Our blog post – “What is the Best Grass Variety for Your Central Florida Yard?” – provides information on the most popular turfgrass varieties, including their characteristics and care. Florida Gardening is another helpful source of information on turfgrass species that are perfect for Central Florida’s climate, as follows.
St. Augustine – This blueish-green bladed turfgrass has a good adaptation to Florida’s soil conditions and climate. It’s tolerant of drought and salt. However, it doesn’t pair well with heavy foot traffic and grows quickly, so frequent mowing is necessary.
Bahia – This low-maintenance turfgrass is deep-rooted and forms thin green blades that thrive in sandy, infertile or acidic soils, and is drought-tolerant. This grass doesn’t require much moisture or fertilizer to produce healthy growth.
Bermuda – Bermuda turfgrass quickly spreads, creating a finely textured mat of medium to dark green grass blades. It’s most commonly used on athletic fields, so it’s perfect for active families that love being outdoors. This grass stands up well to salt, drought, and wear-and-tear. However, it grows quickly and can be high maintenance when it comes to pest control.
Centipede – This slow-growing grass is perfect for low-maintenance lawns. It forms a medium-textured blade that grows close to the ground, which means less mowing. It thrives in sandy, infertile soil – as well as acidic types – and is shade-tolerant.
Don’t Forget to Fertilize!
When it comes time to fertilize your lawn, start with a soil test to determine nutrient requirements as well as your soil’s pH level. Fertilizers are composed of three main elements — nitrogen, phosphorus, and potassium — as well as a variety of other ingredients. Applying the proper amount of fertilizer will help your lawn resist an invasion of weeds. Applying fertilizer at the wrong time or applying too much fertilizer can damage your lawn. If you just installed a new lawn, wait at least one or two months before fertilizing so it doesn’t run off because the root system isn’t developed. Be sure to read the label carefully before applying. Never apply more than one pound of nitrogen per application.
Summer Lawn Pests to Look Out For
Florida’s lawn insect pests are abundant in summer, and you can’t count on our friendly birds and small reptiles to eat all of them! A healthy lawn can keep them at bay. As Florida Pest Control notes, destructive insects target grass and yards that are unkempt and unhealthy, to begin with. They commonly live just beneath the grass, making them almost impossible to detect until the damage is done. Here’s a list of the most unwanted.
- Sod webworms chew through small areas of grass. They create tunnels out of their silky web that runs under the grass. Signs to look for include raggedly chewed grass and smaller brown spots about the size of a baseball.
- Armyworms are small caterpillars that become moths. The females lay up to a thousand eggs at once in patches of fresh grass. These can hatch as quickly as two days. Look for them on the outside of dead or damaged grass areas.
- Chinch bugs attack your lawn by sucking the liquid out of the grass blades. In doing so, patches of grass on your lawn will dehydrate, turn yellow, then turn brown and die.
- Fire ants build their mounds on the lawn and bring the soil to the surface. They produce a painful, venomous sting that can last several days.
- Mole crickets tunnel through the top 1-to-2 inches of soil, loosening it and uprooting grass that then dries out and dies. The damage is most severe in young, newly planted lawns. When dealing with mole crickets, your grass will be covered with brown patches and feel spongy when stepped on.
- Grubs are beetle larvae that remain dormant through the winter. In the spring, they make their way toward the surface to feed on grass roots.
Despite the challenges, it is possible to have a healthy, attractive Central Florida lawn during the heat of summer. Better yet, our experienced team of professionals at Daniel’s Lawn Service & Pressure Washing makes it possible to do so with little effort on your part! We specialize in lawn maintenance, landscaping, landscape design, pressure washing, and more. Visit our website to learn about our services and contact us so we can do the work and you can do the enjoying!
Being Prepared for Hurricane Season
If you’re a Florida native or semi-native, please bear with us. The Sunshine State welcomes numerous new residents every year, most from states that don’t experience hurricanes. So if your eyes glaze over from yet another article about hurricane season – which runs from June 1 through November 30 – there are many people who may be learning this information for the first time. But even if hurricanes are old hat for you, being overconfident can be risky. You just might benefit from a refresher course on how to prepare your yard to prevent severe storm damage!
Fortunately, Central Florida has been spared a direct hit these past several years. However, long-timers know that tropical storms (which may or may not develop into a hurricane, for newcomers out there) and almost-daily summer afternoon thunderstorms also can wreak havoc on landscaping, patios, and other outdoor areas. Forecasters at NOAA’s Climate Prediction Center — a division of the National Weather Service — predict a 65% chance of an above-normal hurricane season this year. Preparing for the worst will help your property be better able to weather anything Mother Nature throws at it this summer and early fall!
What to Do Now to Keep Your Property Safe
If this is your first hurricane season in Florida, don’t panic! The peak months for hurricanes are August and September, giving you enough time to do whatever work needs to be done – either by you or a lawn care professional – like our experienced team at Daniel’s Lawn Service & Pressure Washing!
While you may have already stocked up on bottled water, flashlights, batteries, and non-perishable “hurricane food” that can be eaten without being heated, you should be doing a careful walk-through of your property to identify potential problems and take the necessary steps to head them off now rather than procrastinate until late July.
Pay Attention to Your Trees
It’s easy to take your trees for granted and enjoy the beauty and shade they provide. However, weak, rotting, or dead branches can snap off in high winds, becoming projectiles that crash through windows or roofs, or onto vehicles – as well as bring down overhead utility lines (the main reason for prolonged post-hurricane power outages). Unhealthy or dying trees can likewise be uprooted and cause major property damage. Those who were here in 2004 for Hurricane Charley – which made landfall on August 9 as a category 4 storm (130-156 mph sustained winds) – remember the damage caused by an estimated total of 28,000 trees uprooted throughout Orlando and Winter Park. Since then, Central Florida communities encourage homeowners to prune old or overhanging branches and remove declining trees to prevent a similar situation.
According to the University of Florida, Institute of Food and Agricultural Sciences (IFAS) Extension, a tree that is vulnerable during a hurricane is one with a high center of gravity, a dense canopy, a decayed trunk, two or more trunks, or shallow roots. Shallow roots result from shallow soil or a high water table. Our blog post – “Hurricane Season is Here! Is Your Yard Ready?” – includes the following proactive steps to take:
- Prune weak, rotting, or dead tree branches and remove low-hanging ones near the house.
- Check tree roots for signs of rotting and remove any rotten or diseased trees or shrubs.
- Keep the tree canopy maintained and thinned to increase air circulation.
- Call a professional arborist to periodically maintain trees, or remove them as necessary. University of Florida’s International Forestry Students’ Association (IFSA) recommends hiring a certified arborist to prune trees larger than 15 feet tall of dead branches that can fall on houses, cars, and people. Overly long branches should be shortened and branches with cracks removed or shortened.
However, Wendy Wilbur — environmental horticulture agent for UF/IFAS Extension — cautions against over-pruning in her article for Florida Farm & Family. “If you prune too many healthy leaves, the tree won’t grow properly and become unstable over time.” Our blog post – “Are Your Trees Prepared and Pruned for Hurricane Season?” – covers this topic in greater detail.
Should you have to remove a tree or two and want to replace them (UF/IFAS Extension also recommends removing tall, slender trees from your landscape to reduce the risk of toppling in hurricane-force winds), look for a species characterized by a low center of gravity, a strong, sturdy trunk, and a deep, symmetrical root system. Researchers at the University of Florida have found that sand live oaks are the most resistant to wind damage. Other good choices include the Southern magnolia, live oak, crape myrtle, bald cypress, and sabal palm. These trees are less likely to lose limbs or blow over during hurricanes.
Keep in mind that trees planted in the last five years don’t have an extensive root system to anchor them against strong winds. Reinforce the trunks with 2×4 stakes now, so you aren’t scrambling to do so when a hurricane warning is issued. This is typically recommended if a hurricane is imminent, but as previously mentioned, Central Florida’s afternoon thunderstorms can be severe, and the trunk of a very young tree could snap.
What to Do if a Hurricane Approaches
As a hurricane gets closer to land, you’ll usually have about 24 to 48 hours of warning to prepare before the storm hits. There are key outdoor areas to secure as much as possible to prevent damage. Creative Edge Landscape and Lawn Care offer the following actions to take. Our blog post – “Hurricane Season is Here! Is Your Yard Ready?” – provides additional useful information.
Drainage Areas: These areas should be checked and cleared of all debris. A blocked storm drain or drainage area can create worse flooding problems. If water backs up onto your property and creates loose soil, the root systems of nearby trees may not be able to keep the tree properly anchored. This leads to falling trees and the potential for serious damage.
Yard Cleanup: Anything that can become a projectile in your yard must be dealt with. Yard decorations, tools, furniture and anything not securely anchored into the ground needs to be removed from your yard. In addition to removing these items, now would be the right time to make sure all doors to sheds are closed and secured.
Potted Plants: All potted plants, wind chimes, and other hanging objects need to be brought indoors. Small potted plants that you have around your yard can easily become projectiles, causing damage to property.
Irrigation Systems: Turn off all your irrigation systems. In fact, turning off the main water line would be the best option to prepare for these storms. If a tree falls on your property, the roots could break the water lines and cause flooding or make an existing flood even worse. This will also prevent contaminated water from entering your plumbing system. Be sure to shut off your main water line should you need to evacuate.
Gutters: Take time to make sure your rain gutters are clear of any debris. Secure parts of your gutters that may be weak. When your rain gutters are blocked, it causes excess amounts of water to pool, which can potentially damage your roof.
Pools: If a hurricane is approaching, do not drain the pool. If you do, it can pop out of the ground due to the excessive groundwater pressure caused by heavy rains. Swimming pool maintenance professionals also advise against covering the pool. Although it may seem a logical way to prevent debris from being dumped in, it’s easier to remove branches and other items afterward than replacing an expensive pool cover that’s been damaged by the same.
Be Prepared for Hurricane Season and be Safe
Major jobs that involve cutting large branches or tree removal should be left to a professional who has the experience and equipment to do so safely. Daniel’s Lawn Service & Pressure Washing is located in Lake Mary and serves Longwood, Sanford, Orlando, and the entire Central Florida area. We specialize in tree services, pressure washing, bush hogging, landscape design, and lawn care services. We are licensed and insured, so you can hire us with confidence for all of your yard maintenance needs! Contact us to help you prepare for hurricane season, and take one more worry off your plate this year!
How to Plant a Butterfly Garden
As colorful spring and summer flowers bust into bloom in Central Florida’s gardens, butterflies make their eagerly awaited appearance, bringing delight and a touch of magic! Most yards will be visited by some of these fanciful emissaries of the season, but what if you could encourage even more of them to drop by and stay awhile? Planting a butterfly garden is the way to do it!
By the way, you could attract quite a crowd! According to the University of Florida’s Institute of Food and Agricultural Sciences (UF/IFAS), Florida is home to over 200 species of butterflies – some of which can’t be found anywhere else on Earth.
The Many Benefits of a Butterfly Garden
A butterfly garden can lend much more than beauty to your garden. As colorful as butterflies are, the wide range of flowers that support them are equally colorful. Not only do such flowers attract other pollinators — such as bees and hummingbirds — they also provide year-round color to your yard while promoting a healthy ecosystem.
Creating an ecosystem that allows butterflies and other wildlife to gather, seek shelter, acquire food and water, reproduce and build populations is extremely important. Gardening Solutions — a gardening website by UF/IFAS — lists the following practical benefits a butterfly-friendly garden provides.
- Use of native plants: Hardy and drought-tolerant Florida native plants are also diseases- and pest-resistant, and perform better under local conditions. Use them as the basis of a butterfly-friendly landscape for easier maintenance.
- Food for natural enemies: Healthy butterfly populations attract and sustain populations of insects and smaller organisms. Butterflies provide food for birds, lizards, mammals, etc.
- Plant diversity: A good butterfly-friendly ecosystem is less susceptible to insect pests, with individual plants less apparent in the landscape. This microclimate provides shelter for beneficial insects.
- Scientific: For those who study nature as part of their job (or even amateur nature enthusiasts), keeping detailed logs on the butterfly species encountered, times, and abundance can provide valuable information on butterfly population numbers.
And don’t discount the therapeutic benefits! Butterfly gardens provide a soothing retreat from everyday life. If you use herbs to attract butterflies, you’ll have the bonus of aromatherapy. Our blog post — “Landscaping with Florida Native Plants” — covers the importance of incorporating native plants, as well as a list of some of the most popular species to help you get started!
Best Plants for Attracting Butterflies
If you want your garden to become a butterfly haven rather than just an occasional rest stop, you need to plant the right flowers and shrubs. As you may know, butterflies drink nectar from flowers. However, caterpillars are limited to which plants they can feed on. It’s a good idea to have an assortment of both wildflowers and host plants to ensure enough food for sustainability.
As Florida Gardening notes, “The state’s subtropical climate makes it possible to grow a wealth of different plants that promise to attract butterflies to your landscape. Whether you are looking for specific flower color, plant size, or ones tolerating specific conditions, butterfly plants are suiting your taste and butterfly garden design.”
We’ve compiled the following list of butterfly-attracting plants from Florida Gardening and the Florida Wildflower Foundation to inform and inspire you.
Bottlebrush — The bottlebrush is a popular choice for those wanting a larger shrub that attracts butterflies and hummingbirds. This evergreen produces fierce red flower spikes, saturating the landscape in red hues almost year-round. Gardeners have choices in an upright and weeping variety. The upright form grows up to 20 feet tall and wide. Bottlebrush grows best in full sun, in a variety of well-drained soils, and is salt- and drought-tolerant.
Firebush — Native firebush offers an almost year-round color with its radiant red tubular flowers blooming from spring until the first frost. It attracts hummingbirds and such butterflies as the gulf fritillary and zebra longwing. The shrub also attracts birds feasting on the berries. Firebush produces the best bundles situated in full sun, although it also grows in partial shade and well-drained soil.
Jatropha — Jatropha plants offer a year-round dazzling display of bright red or pink clusters that will have hummingbirds and butterflies lining up to visit your garden. The two common species of this evergreen shrub in Central Florida are Jatropha integerrima, commonly called peregrine, and Jatropha multifidi, better known as the coral plant. They bloom best in full sun, but they tolerate growing in partial shade with a variety of well-drained soils.
Lantana — This evergreen perennial is drought-, heat- and salt-tolerant, as well as being an easy-to-grow low-maintenance plant. However, regular water applications produce the most abundant blooms. The blooms can range in colors of red, purple, yellow, white, and orange, with some a mix of all the colors. Lantana performs well as a groundcover, small shrub, or potted plant, and is sure to brighten butterfly gardens with its profuse colorful display of blooms. It performs best located in a sunny site in well-drained soil.
Milkweed — Milkweed works as a host plant, and is the only plant monarch butterfly caterpillars eat. There are two varieties of milkweed commonly found in the state — the native butterfly weed (Asclepias tuberosa) and tropical milkweed (Asclepias curassavica) — with both performing as perennials statewide. It blooms with clusters of orange or yellow flowers that start putting on their colorful show in summer throughout fall. Tropical milkweed blooms year-round, producing tubular flowers in red, orange, and yellow. These salt- and drought-tolerant perennials prefer full sun to partial shade and well-drained soil.
Dill — Dill offers multiple culinary uses while making a fragrant and useful addition to butterfly gardens. Dill is an important segment of butterfly gardens, as it works as a host plant and is the chosen host for the black swallowtail. Dill performs well in a sunny site with fertile well-drained soil. If you are low on space or want to add color to a patio, dill also performs well in containers.
Fennel — Fennel makes a good addition to butterfly gardens statewide when temperatures cool in fall and winter. Although the licorice-tasting culinary herb is primarily grown for its shoots, foliage, and seeds, caterpillars use it as a host plant. The clusters of small yellow flowers form umbels and attract butterflies. Grow in a sunny location with rich, well-drained soil and water regularly. Fennel also can be grown in a container.
Parsley — This culinary herb has a multitude of uses for cooking, but it’s also a host plant to butterfly caterpillars like the black swallowtail. Use a fertile, well-drained soil in a location that gets morning sun and some shade during the afternoon. Parsley should be treated as a cool-season annual and can be grown in containers.
Butterfly Garden Design and Care
Before heading off to your nearest nursery or garden center, take some time to consider what other components you might need to ensure a successful butterfly garden that promotes the life cycle of Florida’s butterflies. Gardening Solutions recommends following these following steps to establish a butterfly garden:
- Adult nectar sources: Attract and nourish adult butterflies.
- Larval host plants: Attract ovipositing female butterflies; serves as a food source for developing larvae.
- Shelter: Vegetation that provides protection from temperature extremes, storms/rain, and predators, as well as locations for roosting/sleeping.
- Water source with fountain: Allows for easy and consistent access to water for drinking and thermoregulation.
In designing a butterfly-friendly garden, Gardening Solutions provides the following advice. “A wide assortment of flowers is better than having just a few kinds. “Butterflies are attracted to brightly colored, simple flowers with good places to perch. To make sure that nectar is always available, choose your flowers so that something is always in bloom.”
- Provide a combination of adult nectar sources and larval host plants: Attracts maximum variety of butterfly species; encourages butterflies to remain in your yard, reproduce, and build populations instead of just passing through. This allows you the opportunity to appreciate all life stages.
- Incorporate native plants into the landscape whenever possible: Most larval host plants are natives. They’re adapted to the region, will produce a small but representative extension of the natural ecosystem and can attract other wildlife.
- Create horizontal and vertical heterogeneity: Choosing plants that have different heights and growth habits creates numerous microclimates which in turn appeal to a greater diversity of butterfly species; provides shelter; creates levels/strata of feeding opportunities.
- Aim for a consistent host plant and floral venue throughout the growing season: Choose plants that have different blooming times. This ensures that the garden remains attractive and productive as long as possible; provides food for butterflies during periods of low natural availability.
- Provide a number of different flower colors: Different butterfly species are attracted to different flower colors, so include yellow, orange, white, and blue flowers, as well as reds, pinks, and purples.
- Provide a mix of flower shapes: The feeding behavior and proboscis length of a butterfly dictate which flowers will be visited. Long-tubed flowers, for example, are typically more accessible to species with a long proboscis, whereas many composites (daisy-like flowers) provide a feeding platform and easy nectar accessibility for smaller species.
- Plant in shade as well as full sun: Appeals to more butterfly species. Many forest species prefer shadier locations.
- Plant in groupings: This creates an aesthetically pleasing effect that provides masses of color that are more apparent in the landscape. It also allows larvae to locate additional food resources in the event of a shortage.
- Choose appropriate plants for each location: Understand each plant’s basic water, light, and soil requirements so it will perform and grow to its maximum potential.
When it comes to maintaining your butterfly garden, select plants that are suitable for your landscape and use pesticides carefully (preferably not at all) to avoid harming your butterfly guests and other beneficial insects.
- Give new plants a good start: Water and mulch new plantings to insure firm establishment.
- Fertilize: A regular fertilizing regimen will produce maximum growth and flower production.
- Avoid pesticide application when possible: All butterfly life stages are very sensitive to pesticides; when a pest problem arises, treat it locally. Use beneficial insects/natural enemies.
- Learn to identify the butterfly species in your garden: Provides greater enjoyment; allows for the gardener to “plant” for particular local species.
Other butterfly-friendly options for controlling and eliminating pests include:
- Spraying the pests off with a blast of water.
- Hand-picking the pests off the plants.
- Releasing other beneficial insects into the garden — such as ladybugs and green lacewings that attack and eat pests, like aphids.
- Keep your garden free of weeds that play host to pests such as aphids.
The Take-Home Message
A butterfly garden is not only lovely to look at, it provides relaxation and serenity for you — as well as a valuable habitat for other beneficial insect species and small animals. If you have the time to plan, plant, and lovingly tend to this special type of habitat, we hope we’ve helped give you the information to get started!
If you’d love to bring this little slice of Central Florida paradise to your yard, but can’t devote the numerous resources necessary to DIY, call us at Daniel’s Lawn Service & Pressure Washing! Our experienced team can work with you to achieve your goals and bring your vision to life! We also provide landscape design, tree installation, tree trimming, yard maintenance, pressure washing and so much more. Contact us today!
Turn Up Your Spring Cleaning With Pressure Washing
Pressure washing provides many benefits when added to your spring cleaning checklist. While you may focus mainly on the aesthetics of your landscaping as you clear out the old and plant the new, your hardscapes (non-living elements, such as walkways, decks, and fences) need to be cleaned of dirt, grime, algae, mildew, and mold to get your property in optimum shape for outdoor relaxation and entertaining. In addition, a good pressure washing on a regular basis can extend the life of such surfaces while creating a more hygienic environment.
However, not every surface can be pressure washed in the same way. As easy as some videos make it look, many factors are involved in successfully cleaning without damaging the surface — or injuring yourself or someone else. Or breaking a window or causing some other type of property damage by a high-pressure spray pointed in the wrong direction. Here’s what you need to know about pressure washing the most common types of surfaces on your property, so you can decide whether to tackle these projects yourself — or hire our experienced pros at Daniel’s Lawn Service & Pressure Washing!
Advantages of Pressure Washing Your Driveway, Walkways, and Patio Slab
Often, the most utilitarian outdoor surfaces are the most overlooked. How often do you really think about your driveway? As it leads up to your garage or carport (another surface to pressure wash), the driveway is a prominent feature that’s a component of your home’s overall curb appeal. A dirty, stained driveway creates a poor impression of your property, making it appear neglected. Walkways leading to the front door — and the front porch slab itself — should be clean to create a welcoming effect that also reflects your pride of ownership. And whether your home has a modest back patio slab or a grander patio area, you, your family and your friends will enjoy the backyard much more if it’s sparkling!
Of course, if you’re planning to sell your house, it’s essential for every element to be in top condition. Your home is more likely to sell faster, at a higher price. Homebuyers assume a home that appears to be well-cared for is also in excellent repair and has no unpleasant surprises awaiting the next owner.
For those interested in doing it yourself, start by learning about the equipment itself. There are two types of pressure washers: electric and gas. The first type is intended for consumer use and is ideal for smaller projects requiring low pressure – such as patios and fences. Because they are electric, the job can’t be far from an electrical outlet. Gas models are suited for commercial use. They are more powerful and can be used wherever needed, as they aren’t tethered to a power cord.
When choosing a pressure washer, PSI (pounds per square inch) and GPM (gallons per minute) are both equally important. The PSI refers to the amount of pressure produced and GPM refers to the amount of water flow. If you are considering purchasing a pressure washer, The Home Depot has an informative article covering both types in greater detail. You also may want to reference our blog post – “What is the Right Way to Do Residential Pressure Washing?” – for safety precautions and equipment you’ll need.
Whether you ultimately decide to DIY or call us, your driveway should be on the to-do list. According to First Class Clean, “Pressure washing your driveway will prevent harmful growths such as mold, mildew, algae, and moss. These growths can gradually eat away at your driveway surface, resulting in safety hazards and costly repairs down the road.”
Other benefits of pressure washing your driveway include:
- Limiting weed growth.
- Eliminating stains.
- Saving the time and exertion of manually scrubbing.
Driveways and sidewalks aren’t the only areas around your home that need cleaning. Porch decks and patio slabs need attention, as well. However, the processes vary based on the material. For example, most porch decks are built of wood, while patio slabs are commonly constructed of concrete. Choosing the right power washer and operating it at the correct pressure setting are the first keys to successfully power washing each type of surface.
Wood decks can present a challenge. As a natural material, wood can splinter if sprayed at too high a pressure. HGTV states that for cleaning a wooden deck, you’ll be best served by using the lowest pressure setting that’s still effective. Since there are different types of wood, you’ll still need to adjust the pressure for soft or hardwood. HGTV offers the following advice:
- Softwoods such as cedar or pine require about 500 to 800 psi.
- Harder woods require up to 1200 to 1500 psi.
- Choose a fan tip or rotating tip.
- Remember to always start the water pressure in an area that can be easy and cheap to repair or replace, pointing away from people and glass windows.
- Start at least two feet from the wood deck, then feather the pressure into a range from about a foot to 18 inches from the deck.
- Never get closer than 12 inches from the deck unless you’re using low pressure.
If you’re doing it yourself, make the process environmentally friendly by choosing a non-toxic cleaner that is safe for people, pets, and plants.
Don’t Forget to Pressure Wash Your Fence!
As mentioned earlier, different materials require different water pressure settings. The most popular fencing materials for Central Florida homes are wood and vinyl. While vinyl fences are both attractive and weather-resistant, they are more likely to show dirt, stains, and other grime due to their nonporous surface — and therefore may require more frequent cleaning.
For wood fences, you can still use the suggested psi settings listed above — depending on your fence’s material — but the correct nozzle to ensure a thorough cleaning without damage is a 25-degree tip — the green nozzle tip.
Common sense prep and safety advice for all pressure-washing jobs:
Start by clearing loose debris from the area — including objects that you could trip and fall over. Make sure to close all doors and windows to prevent damaging the interior of your home, and cover plants, deck furniture, electrical outlets, and light fixtures with a tarp. Keep children and pets away from the area.
PresureWashr provides these additional helpful tips for pressure washing wood fences:
- Use a bottom-up approach when applying detergent to your fence to prevent streaking.
- Work in sections. If you apply detergent to your entire fence before rinsing it off, the detergent will harden on the fence.
- Let the detergent sit on the fence for 5-10 minutes.
- Cover one to two boards at a time repeating the wash, sit, rinse method.
- Rinse from top to bottom to prevent streaks.
- Wait 48 hours for the wood to dry before applying paint, stain, or sealer.
AG Vinyl Fencing suggests using the following cleaning methods for vinyl fences:
- Vinyl fences are exposed to the elements 24/7, so you should wash and wipe them at least once per week, especially during dust and rain-heavy seasons when pollen and other pathogens are more prominent.
- Vinegar is an overlooked but highly effective eco-friendly option for cleaning vinyl fences and other surfaces. White vinegar kills dozens of pathogens, including salmonella and flu viruses.
- Start by testing the strength of your vinyl fencing structure by spraying with a moderate-to-high-pressure hose.
- Once water pressure is assessed and adjusted, infuse your spraying tool with a mild detergent or non-toxic cleaning solvent.
- Depending on the level of dirt and grime that your vinyl fencing has, allow the structure to sit untouched for at least 3 to 5 minutes without allowing the solution to dry.
- Break out your power washer to remove lingering grime and detergent bubbles, then use a moderate water flow to rinse and revitalize the vibrancy of your vinyl fence.
A Word About DIY Pool Deck Pressure Washing
You may be laboring under the impression that a pool deck would be the easiest place to pressure wash, but such is not the case. According to ProClean, “Concrete has many pits and pores along its surface, and is prone to chips, cracks, splits, and other such damage. Patio pavers and outdoor stone tiles are also typically covered in nooks and crannies and may be softer than you assume.”
Not only do pool decks collect the usual mold, mildew, and algae that all outdoor surfaces harbor, but they also collect pool chemicals — which are more difficult to get rid of, as they seep into the pits. Since store-bought cleaners are not strong enough to dissolve thick, caked-on residue, determining the proper detergent and pressure for the changing surfaces requires a professional eye to deliver the best results.
A professional pressure washing service provides the following advantages over taking the DIY approach:
- Pros use specialty surfactants that soak into all the pits and pores to dissolve the most hardened, thickest dirt and grime.
- Pros can recognize stains on concrete and patio pavers — including motor oil, rust, and paint droplets — and apply specialty detergents, then scrub the area as needed.
- Pros can recommend and apply soft wash systems for cleaning a concrete pool deck. Soft wash systems start with a surfactant that dissolves thick dirt and sand. A low-pressure rinse removes all that residue without damaging concrete paint or sealant or cracking and chipping pavers and stone tiles.
- Pros ensure that all dirt and grime are brushed and cleaned away from your home and lawn properly to avoid damage and an unsightly mess.
Pressure washing your home requires knowledge, experience, and the proper tools to ensure a job well done. If this sounds like a project that might be out of your depth, contact Daniel’s Lawn Service & Pressure Washing to handle it for you! We provide lawn maintenance, landscaping, pressure washing, and more to fit your needs! Contact us today to schedule an appointment.


